The Voidsong Campaign Mission in Warhammer 40k: Space Marine 2 is the fifth mission in the game, tasking players with accessing the Astropathic Relay and sending a message to Lord Calgar. In this engaging quest, players assume the role of Lieutenant Titus after he returns with Morias Leuze and discovers the famed Aurora weapon.
Here’s a comprehensive guide on how to successfully complete the Voidsong Campaign Mission in Warhammer 40k: Space Marine 2.
The fifth campaign mission features several key objectives, outlined below:
- Report to Captain Acheran
- Speak with the Chaplain
- Head to the Launch Bay
- Board the Thunderhawk Gunship
- Make your way to the Astropathic Relay
- Restore power to the door
- Progress to the Relay Entrance
- Defend the Relay
- Enter the Relay Sanctum
- Transmit a message to Lord Calgar
- Defeat Imurah
We have prepared a detailed step-by-step guide including every objective and combat strategy to assist you in completing the Voidsong Campaign Mission in Warhammer 40k: Space Marine 2:
Report to Captain Acheran
")
Your first task is to meet Captain Acheran, who has summoned you. Navigate to the yellow assembly point and interact with the control unit to activate the elevator.
Follow the yellow marker to find Captain Acheran. A cutscene plays where he informs Titus about heretic Astartes overwhelming Avarax before assigning him six men to assist with the mission.
Speak with the Chaplain
")
Your next objective is to meet with the Chaplain. Take the elevator to the upper deck and engage with him.
Go to the Chaplain’s area as indicated by the yellow marker. He reminds Titus that the conversation with Lord Calgar will influence the course of the war and emphasizes the importance of choosing his words carefully, warning him that any failure to trust the Primarch’s will renders him unfit for duty. After this exchange, Titus departs.
Head to the Launch Bay
")
Following your discussion with the Chaplain, make your way to the Launch Bay. Follow the yellow marker to the elevator, which leads you to the launch bay, and then continue following the marker to reach the Thunderhawk Gunship.
Titus will meet the six marines accompanying him in the Voidsong Campaign Mission in Warhammer 40k: Space Marine 2 and brief them on their objectives.
Board the Thunderhawk Gunship
")
Your next goal is to board the ship to progress in the Voidsong Campaign Mission.
While on board, you will see the mission objectives:
- Access the Astropathic Relay
- Send a Message to Lord Calgar
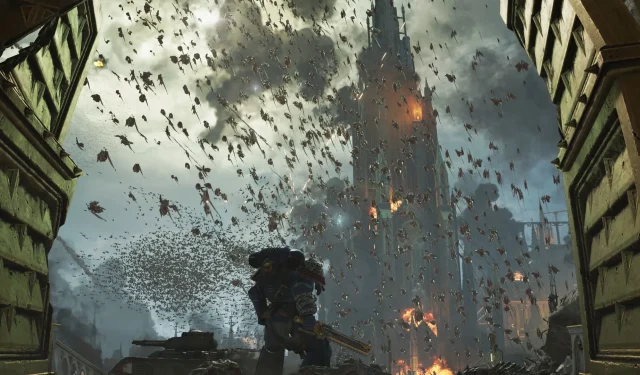
Proceed to the Astropathic Relay
")
Upon landing at Avarax, your mission is to reach the Astropathic Relay. Move ahead, passing Cadian guards, tanks, and where traitors are executed (as heresy is intolerable). Make your way to the camp’s end.
Walk through the large door and follow the yellow marker to the assembly point where you will wait for your squad. Interact with the control unit to activate the elevator leading to the next level of the Voidsong Campaign.
In the lobby area, you will find various weapons and ammo crates to stock up before proceeding further into the Voidsong Campaign Mission.
Travel to the yellow marker and interact with the jammed gate to open it. As you move toward the relay, be prepared for an ambush by a swarm of spores. Use ranged attacks to eliminate them before they can close in on you.
After clearing the spores, the squad will realize that the bridge is too damaged to cross, but Chairon will suggest an alternate route. Follow the yellow marker to the fallen statue and interact with it to clear a pathway. Press on and eliminate all visible Tyranids, as per the Emperor’s command.
Continue forward and enter the gate on your left. Ascend the stairs to reach the upper level, where a tank will clear a path for you. Follow the newly opened route to the next area. Once outside, dispatch all Tyranids with your ranged assaults.
To proceed, move right and descend to the lower levels. Ascend the stairs, continuing forward until you encounter a horde of Tyranids that must be defeated.
Keep advancing and eliminating all Tyranids in your path. Among them, you will spot a Neurothrope, a particularly formidable foe in Warhammer 40k: Space Marine 2.
After defeating the Xenos, proceed to the yellow marker and interact with the control unit to unlock the door, leading to the next stage of the Voidsong Campaign Mission. Continue deeper into the structure until you reach a door that is powered down.
Restore Power to the Door
")
Your objective now is to restore power to the door. Head up the stairs to the right and proceed inside. In the expansive room, you’ll find ammo caches and boxes to replenish your supplies. Head to the yellow marker and engage the control unit to activate power.
Follow the yellow marker to the next door and interact with the control unit to enter the next phase of the Voidsong Campaign Mission.
After the door opens, you’ll face heretic Astartes. Eliminate them before proceeding. Wait for your squad to arrive at the assembly point and engage the control unit at the elevator to gain access to the next level of the mission.
Upon reaching the upper floor, you’ll land in a heated area filled with Xenos and heretics. Dispose of all enemies for the glory of the Imperium, moving to the narrow route left of the spores to the next segment of the Voidsong Campaign Mission in Warhammer 40k: Space Marine 2. Clear out all Xenos and heretics in this area.
Once the area is cleared, head up the stairs to reach the next level. Follow the yellow marker to the assembly point and interact to remove the column, clearing a path forward. A cutscene occurs where Titus requests a Gamma pattern Hammerfall Bunker to provide them with armor and Jump Packs. The scene ends with Gadriel, Titus, and Chairon blasting off into the air with their Jump Packs.
Advance to the Relay Entrance
")
In this segment of the Voidsong Campaign Mission in Warhammer 40k: Space Marine 2, your goal is to advance to the relay entrance and get closer to relaying the message to Lord Calgar. Clear out all Xenos around the area before you can proceed, utilizing your Jump Pack’s special abilities to eliminate enemies quickly.
Once the area is cleared, wait for the large blast doors to open. Proceed inside to the next stage of the Voidsong Campaign Mission, where numerous ammo boxes and weapons await. It’s wise to restock before continuing.
In this section, use your Jump Pack to ascend through the levels, timing your jumps exactly for a safe landing. When you reach the upper level on the left, eradicate all Xenos encountered.
Continue until you find the Cadians. Help them destroy the remaining Tyranids, then use your Jump Pack to advance to the next level. Land at a lower level and support the soldiers in defeating the Empire’s scourge.
After eliminating the last of the Xenos, follow the yellow marker to the assembly point and wait for your squad. Engage the control unit to open the large blast door that will lead you further into the Voidsong Campaign Mission.
As you move inside, continue advancing. Once in a large area, your Jump Packs will be affected by dust, limiting your mobility and range. Eventually, Titus announces that the Jump Packs are completely inoperable, and you must advance on foot. Reach the upper ledge and drop down to the lower area to continue with the Voidsong Campaign Mission in Warhammer 40k: Space Marine 2.
Defend the Relay
")
Your next task is to defend the Astropathic Relay so Titus can send the message to Lord Calgar. Eliminate all Tyranid threats in the name of the Imperium. Assist the Cadian soldiers in holding the line at the Relay station against the onslaught of Xenos, including the fierce Zoanthropes.
Sudden ambushes by a Carnifex will occur. Taking down a Carnifex in Warhammer 40k: Space Marine 2 is a daunting challenge, but necessary for progression in the Voidsong Campaign.
Utilize rapid-fire and ranged attacks to defeat the monster. Your chainsword or other melee weapons are also viable for dealing significant damage. There will be plenty of ammo and Krak grenade crates available to hurl at the Carnifex for massive impact.
Just as things seem to stabilize, another Carnifex will appear. Continue your fight until the Carnifex falls to Imperial steel. In the midst of the battle, a green aura will fill the area as Titus announces that Talasa has successfully eliminated the Hive Tyrant, causing all Xenos to drop dead.
Enter the Relay Sanctum
")
Your next goal is to enter the Relay Sanctum. Proceed into the building, following the yellow marker to reach the assembly point and await your squad’s arrival.
Once they arrive, interact with the control unit to activate the elevator leading to the subsequent level of the Voidsong Campaign Mission. A charged cutscene plays as Gadriel requests his transfer to another squad.
Transmit a Message to Lord Calgar
")
Upon reaching the Astropath Sanctum of the Astropathic Relay, your mission is to transmit the message to Lord Calgar. Move outside and head straight to the relay room. Continue forward, take a right, and proceed down the stairs.
Follow the yellow marker to the assembly point and wait for your squad. Interact with the door to continue to the next level of the Voidsong Campaign Mission. A cutscene plays where Titus and Elodias engage in an argument, interrupted by Neoma, who agrees to send a message.
During the ritual to send the message, Neoma suddenly halts and accuses Titus of being a traitor, claiming he lured Calgar into a trap for personal gain. She asserts that Titus covets the Power Stone and must be stopped. In the ensuing chaos, Gadriel attacks Titus.
Just then, Chairon shoots Neoma during their struggle. A surge of Chaos energy flows through her, transforming her into Imurah, the Sorcerer Lord of the Thousand Sons Chaos Legion, exposed to the darkness by Chaos’s corruption.
Defeat Imurah
")
Your final task in the Voidsong Campaign Mission in Warhammer 40k: Space Marine 2 is to defeat Imurah. Keep firing at him and inflict as much damage as possible. Evade his special attacks as they can deal significant damage. You will also have to fend off chaos Astartes while dealing damage to Imurah.
Engagements with Imurah occur in multiple phases until you can best him. Eventually, Titus will shout that Imurah is attempting to escape.
A cutscene follows, with Imurah disappearing from the battlefield. Captain Acheran contacts the squad via vox to report Chaos infiltration in pursuit of Aurora. The Battle Barge will swiftly move to Demerium to provide assistance. The Voidsong Campaign Mission in Warhammer 40k: Space Marine 2 concludes with the three ultramarines heading towards the Battle Barge.
Related Articles:

Warhammer 40,000: Space Marine 2 Update Introduces Ultrawide Support for PC, Private Operations Lobbies, and Additional Features
20:20
Warhammer 40,000: Space Marine 2 Weapons Upgrade Guide – Top Choices for Early Enhancements
13:30
Warhammer 40,000: Space Marine 2 Leveling Guide – Tips for Quick Level Up
13:29
Leave a Reply