Understanding the layouts of different maps is crucial, as some are tailored for close-ranged Brawlers while others cater to long-ranged ones.
This article will delve into all the active Duo Showdown maps in Brawl Stars and recommend the best Brawlers to enhance your win rate.
Current Duo Showdown Maps in Brawl Stars and Recommended Brawlers
As of now, there are 12 active Duo Showdown maps in Brawl Stars. These maps rotate daily, following a repeating cycle. The available maps are:
1) Double Trouble
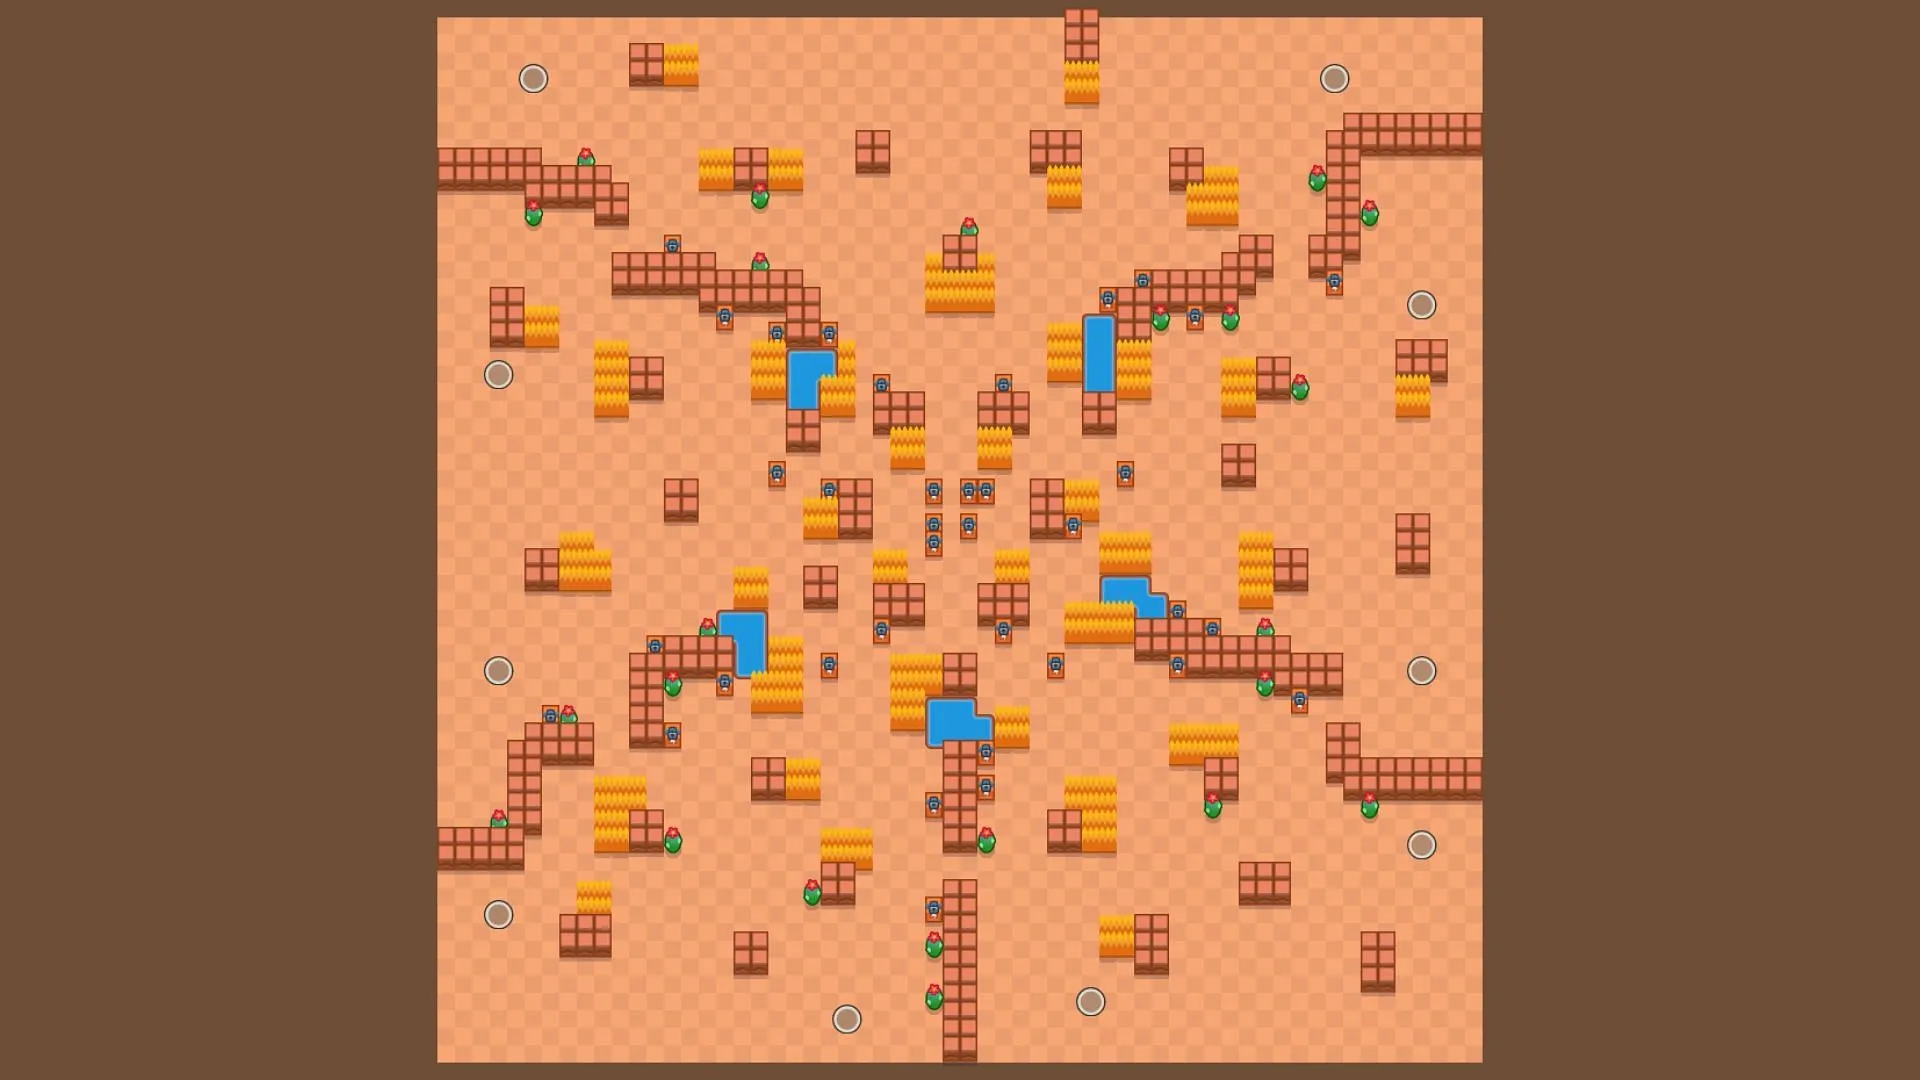
The Double Trouble map is ideal for long and medium-range Brawlers. Its X-shaped design offers ample open spaces for ranged fighters.
Popular Brawlers here include Mortis, Colt, and Piper. Some effective Duo Showdown team compositions for this map are:
- Kit + Piper
- Colt + Piper
- Mortis + Piper
- Colt + Kit
- Colt + Mortis
2) Skull Creek
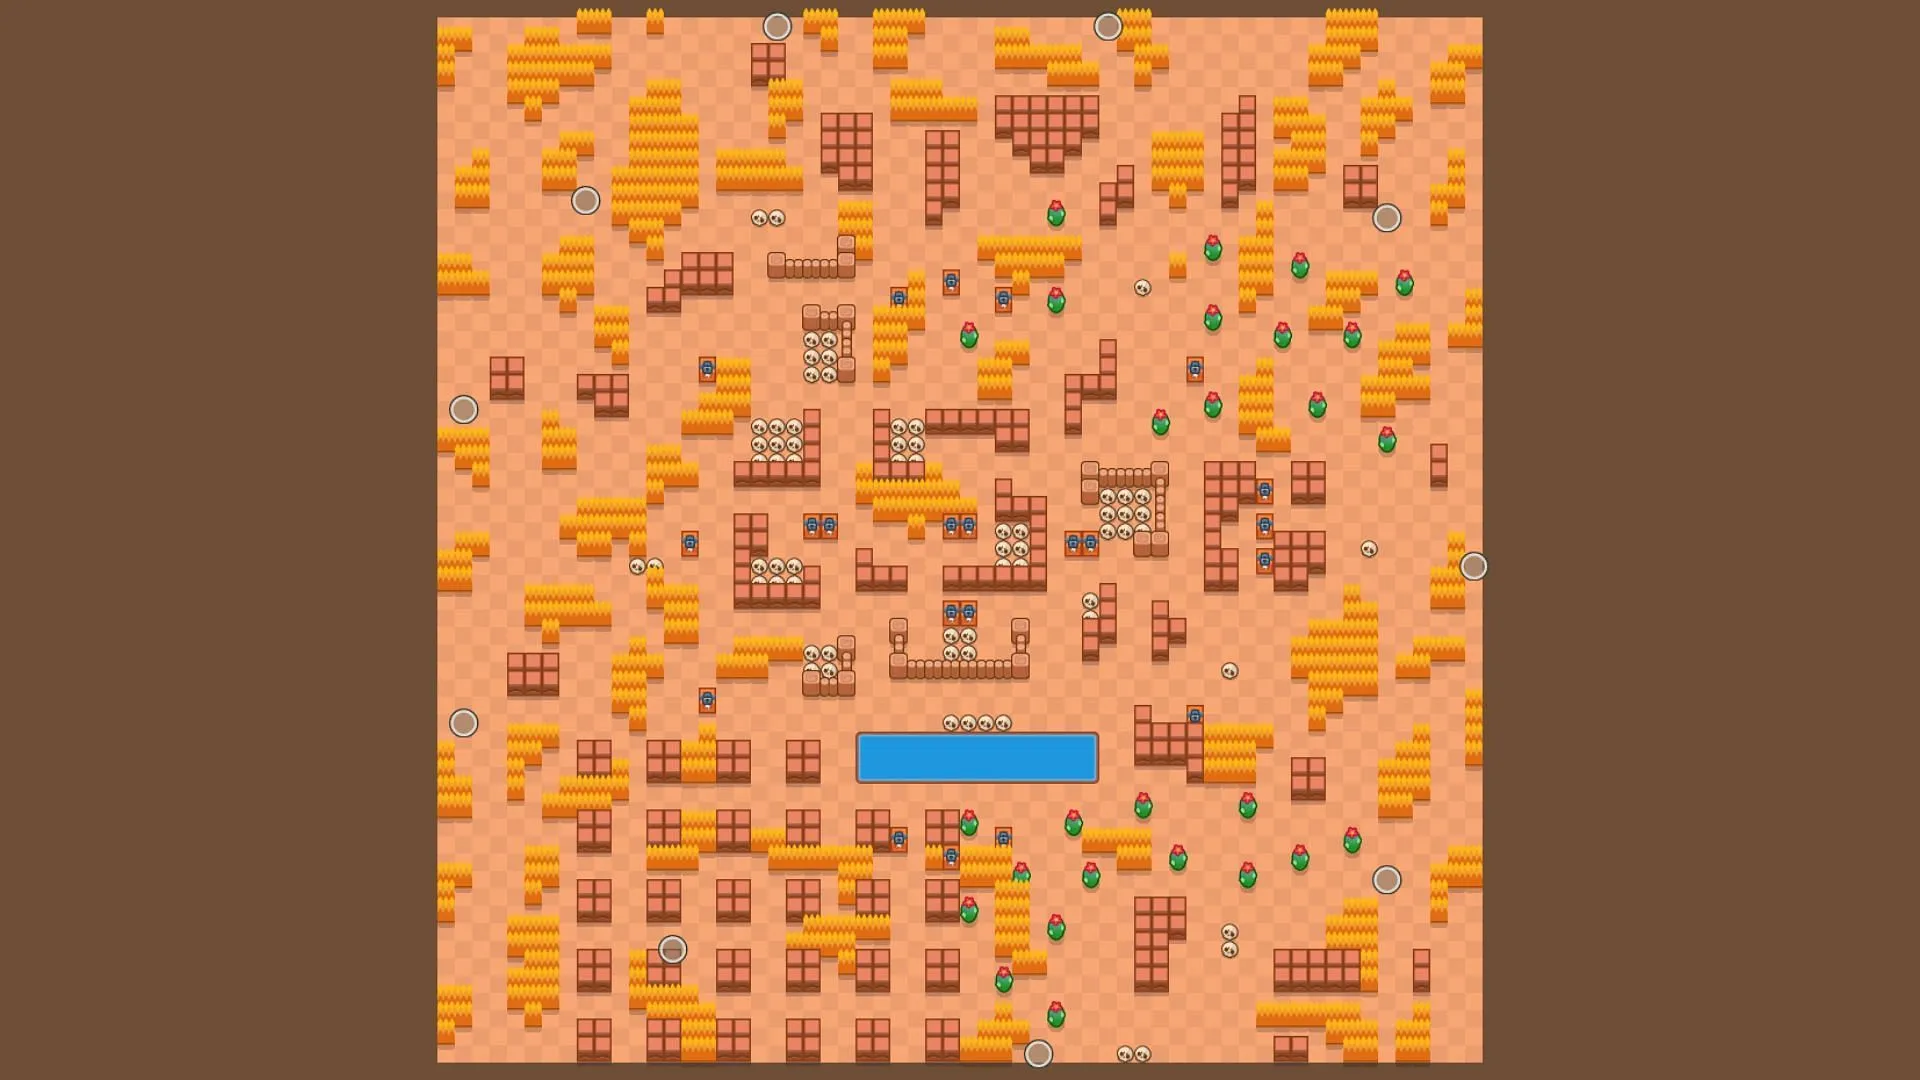
If you enjoy maps with a maze-like structure, Skull Creek offers an uneven layout filled with bushes and grid-like walls, favoring melee and medium-range Brawlers.
Berry, Moe, and Dynamike are commonly chosen Brawlers for this map. Recommended Duo Showdown team compositions include:
- Berry + Moe
- Kit + Moe
- Dynamics + Kit
- Clancy + Moe
- Dynamike + Surge
3) Rockwall Brawl
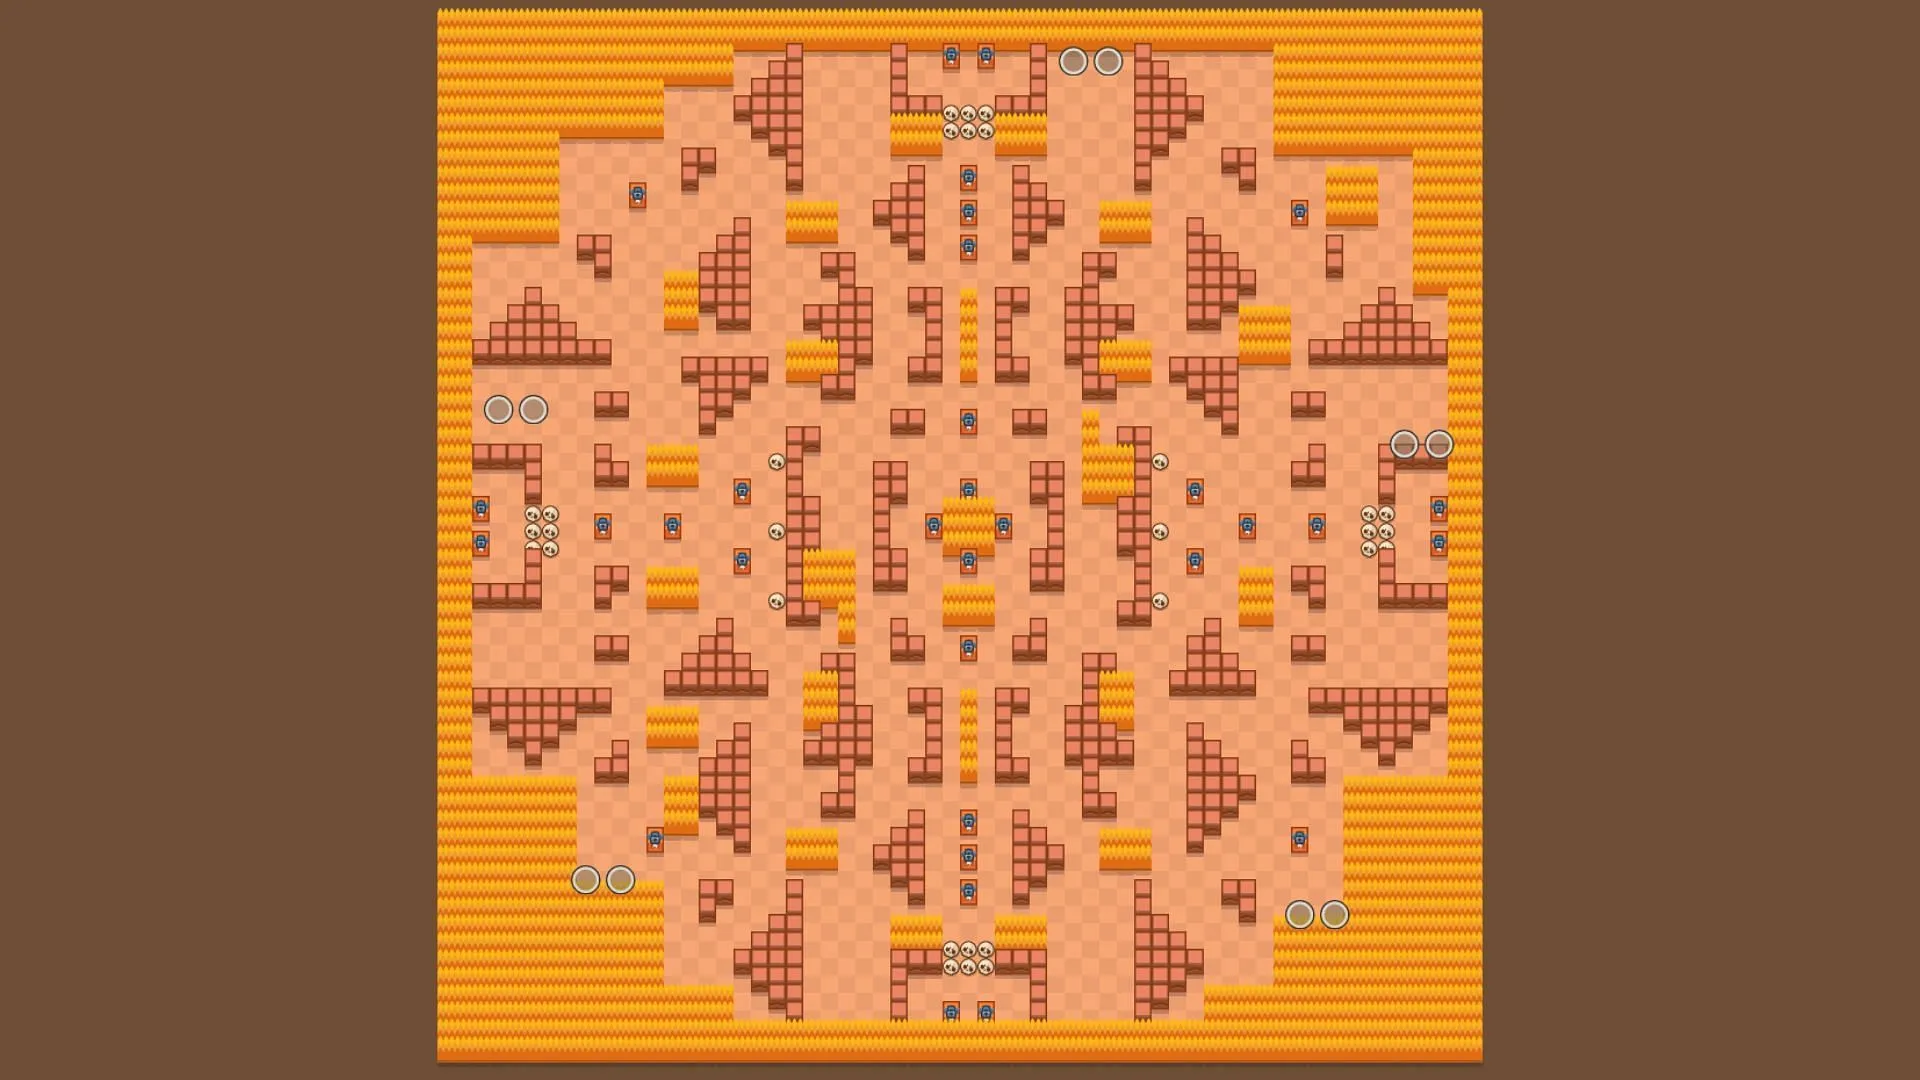
Rockwall Brawl features a symmetrical design with bushy sides and is favored by Brawlers who thrive in such environments.
Moe is currently a popular choice for this map. The following team compositions work well:
- Berry + Moe
- Kit + Moe
- Dynamics + Kit
- Clancy + Moe
- Dynamike + Surge
4) Feast or Famine
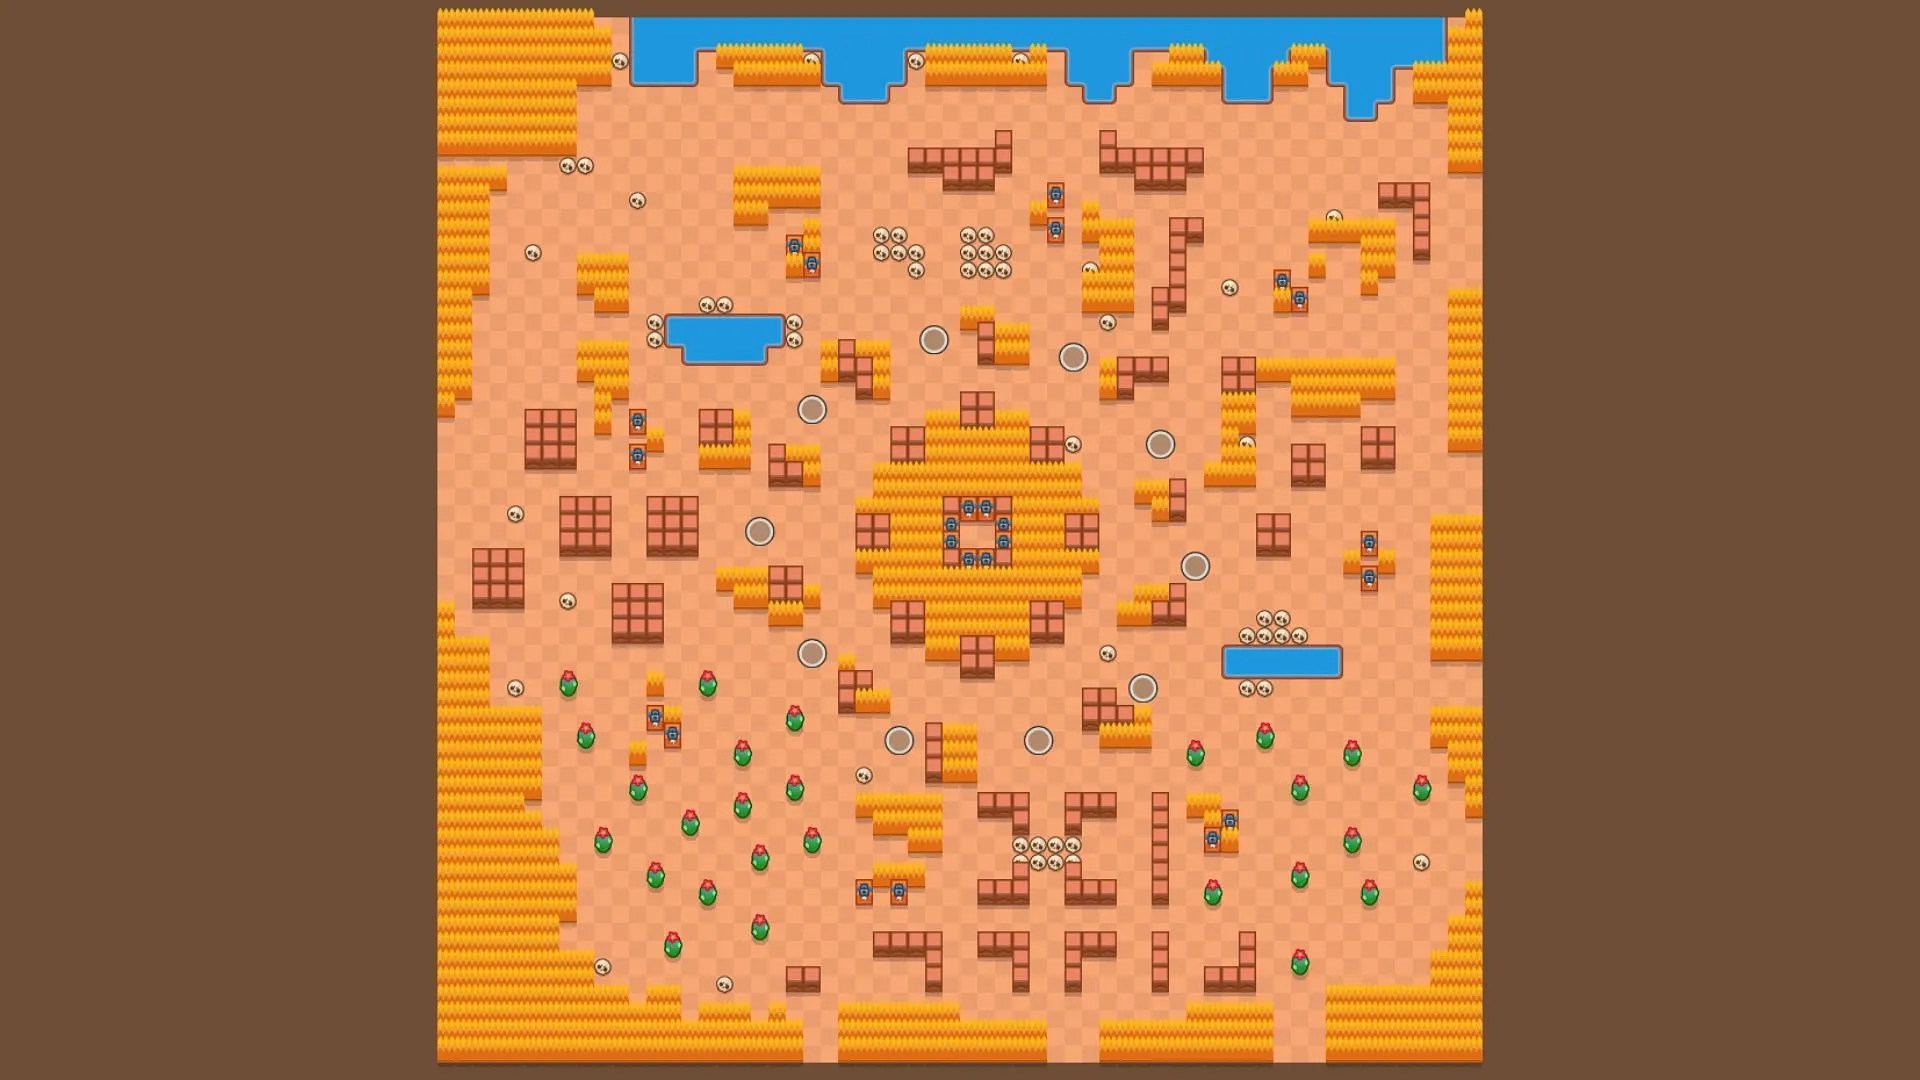
Feast or Famine is a fan-favorite map due to its center-located power cubes, making it a race to see who can get there first.
Buzz stands out on this map for his close-range capabilities and repositioning super. Effective team combinations with Buzz include:
- Buzz + Shelly
- Buzz + Doug
- Buzz + Surge
- Buzz + Jacky
- Buzz + Emz
5) Cavern Churn
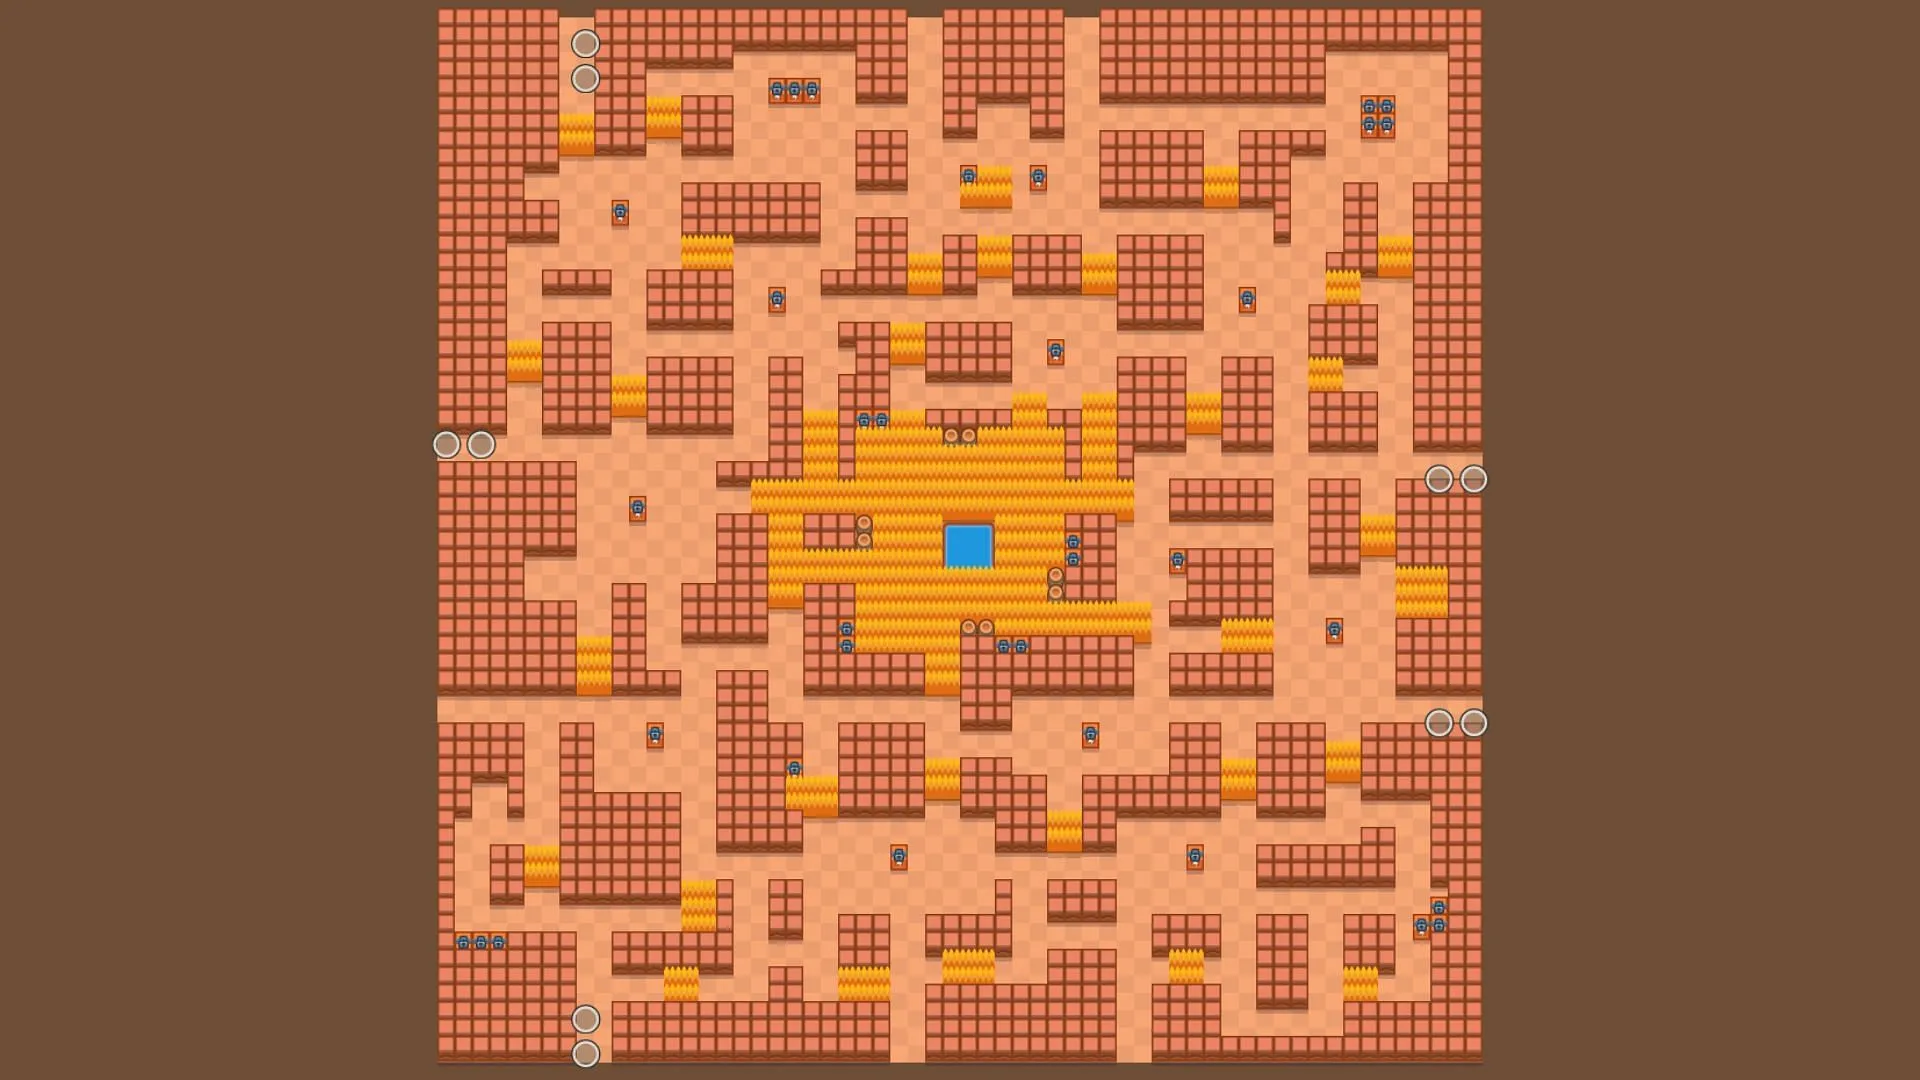
The Cavern Churn map features thick walls and fewer bushes, making it favorable for close-range Brawlers.
Buzz and Bo are effective here, as Buzz excels at close range while Bo’s Star Power reveals enemies in bushes. Team compositions for this map are:
- Buzz + Shelly
- Buzz + Rico
- Bo + Shelly
- Bo + Buzz
- Bo + Bull
6) Stormy Plains
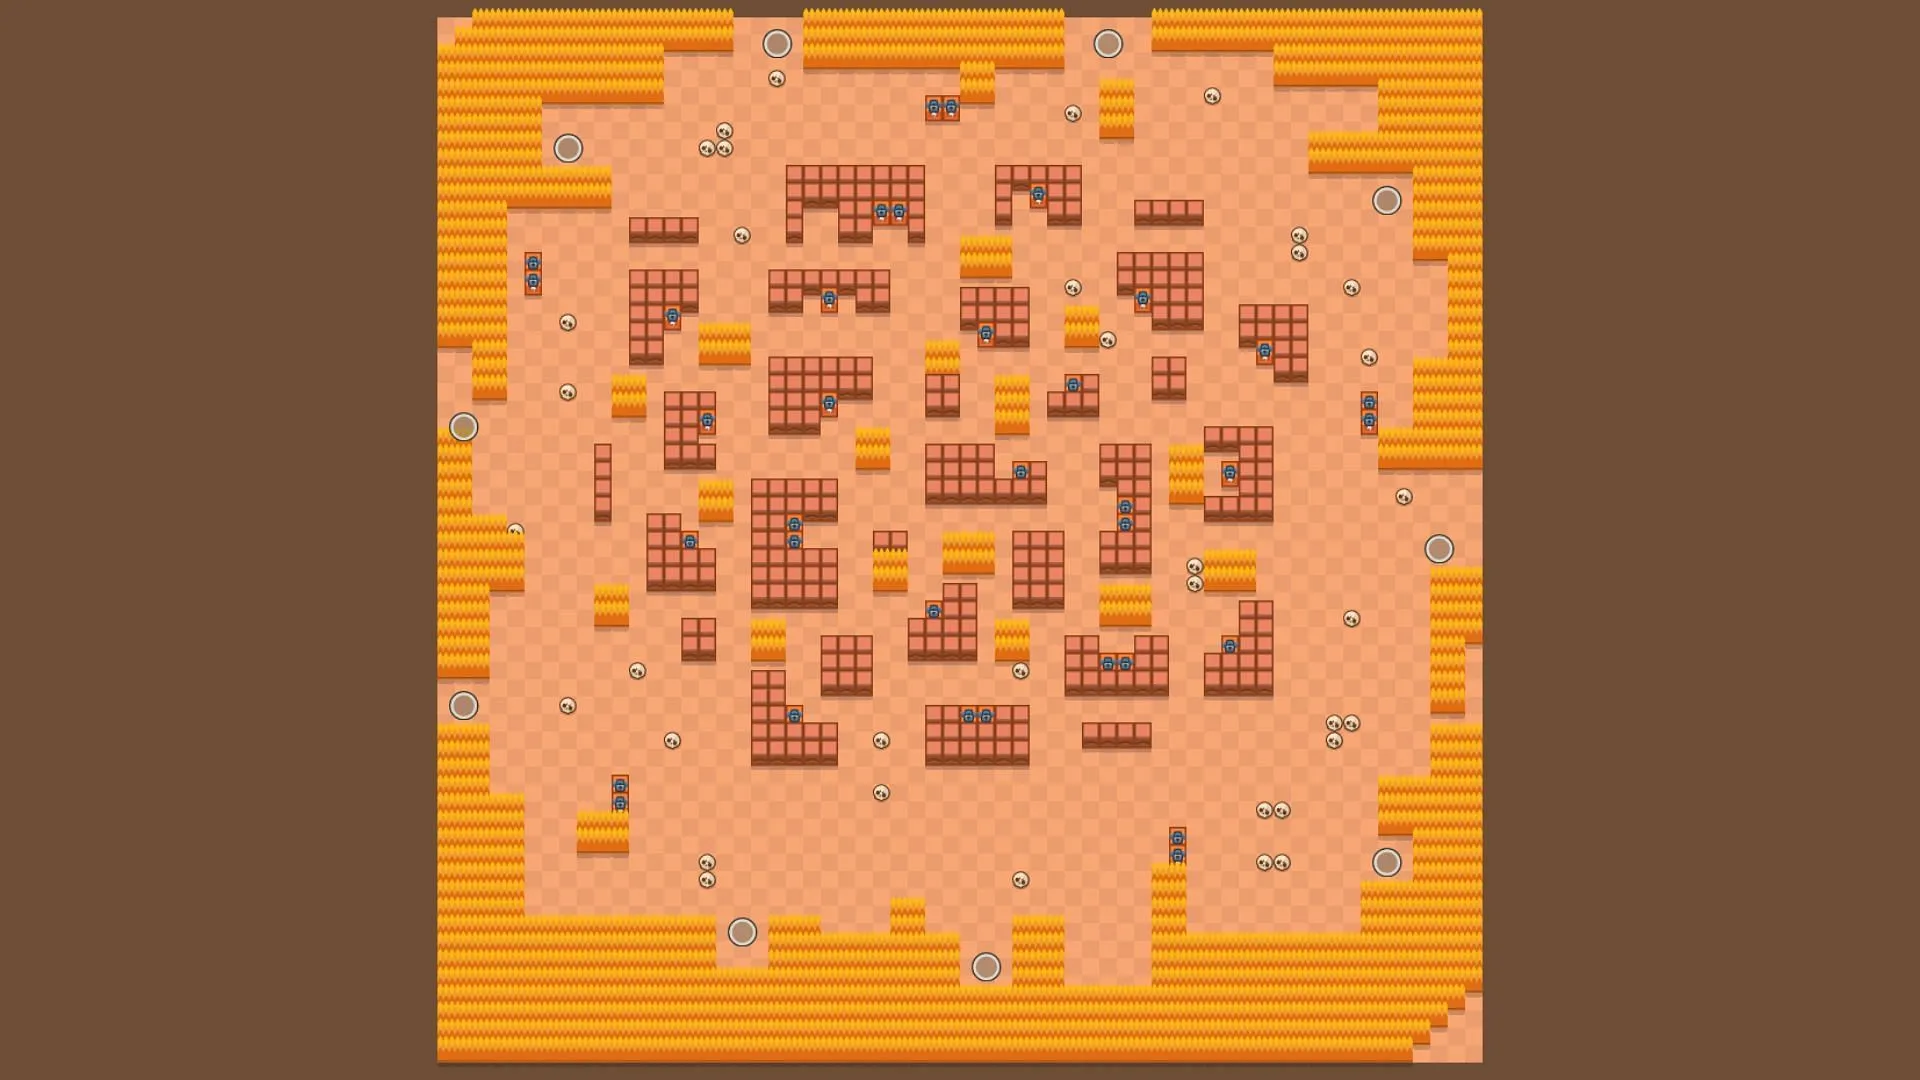
The Stormy Plains map shares similarities with Rockwall Brawl and Feast or Famine, featuring many power cubes concentrated at the center.
Dynamike is frequently selected on this map and pairs well with:
- Dynamics + Kit
- Dynamike + Mortis
- Dynamike + Surge
- Dynamike + Edgar
- Berry + Moe
7) Dark Passage
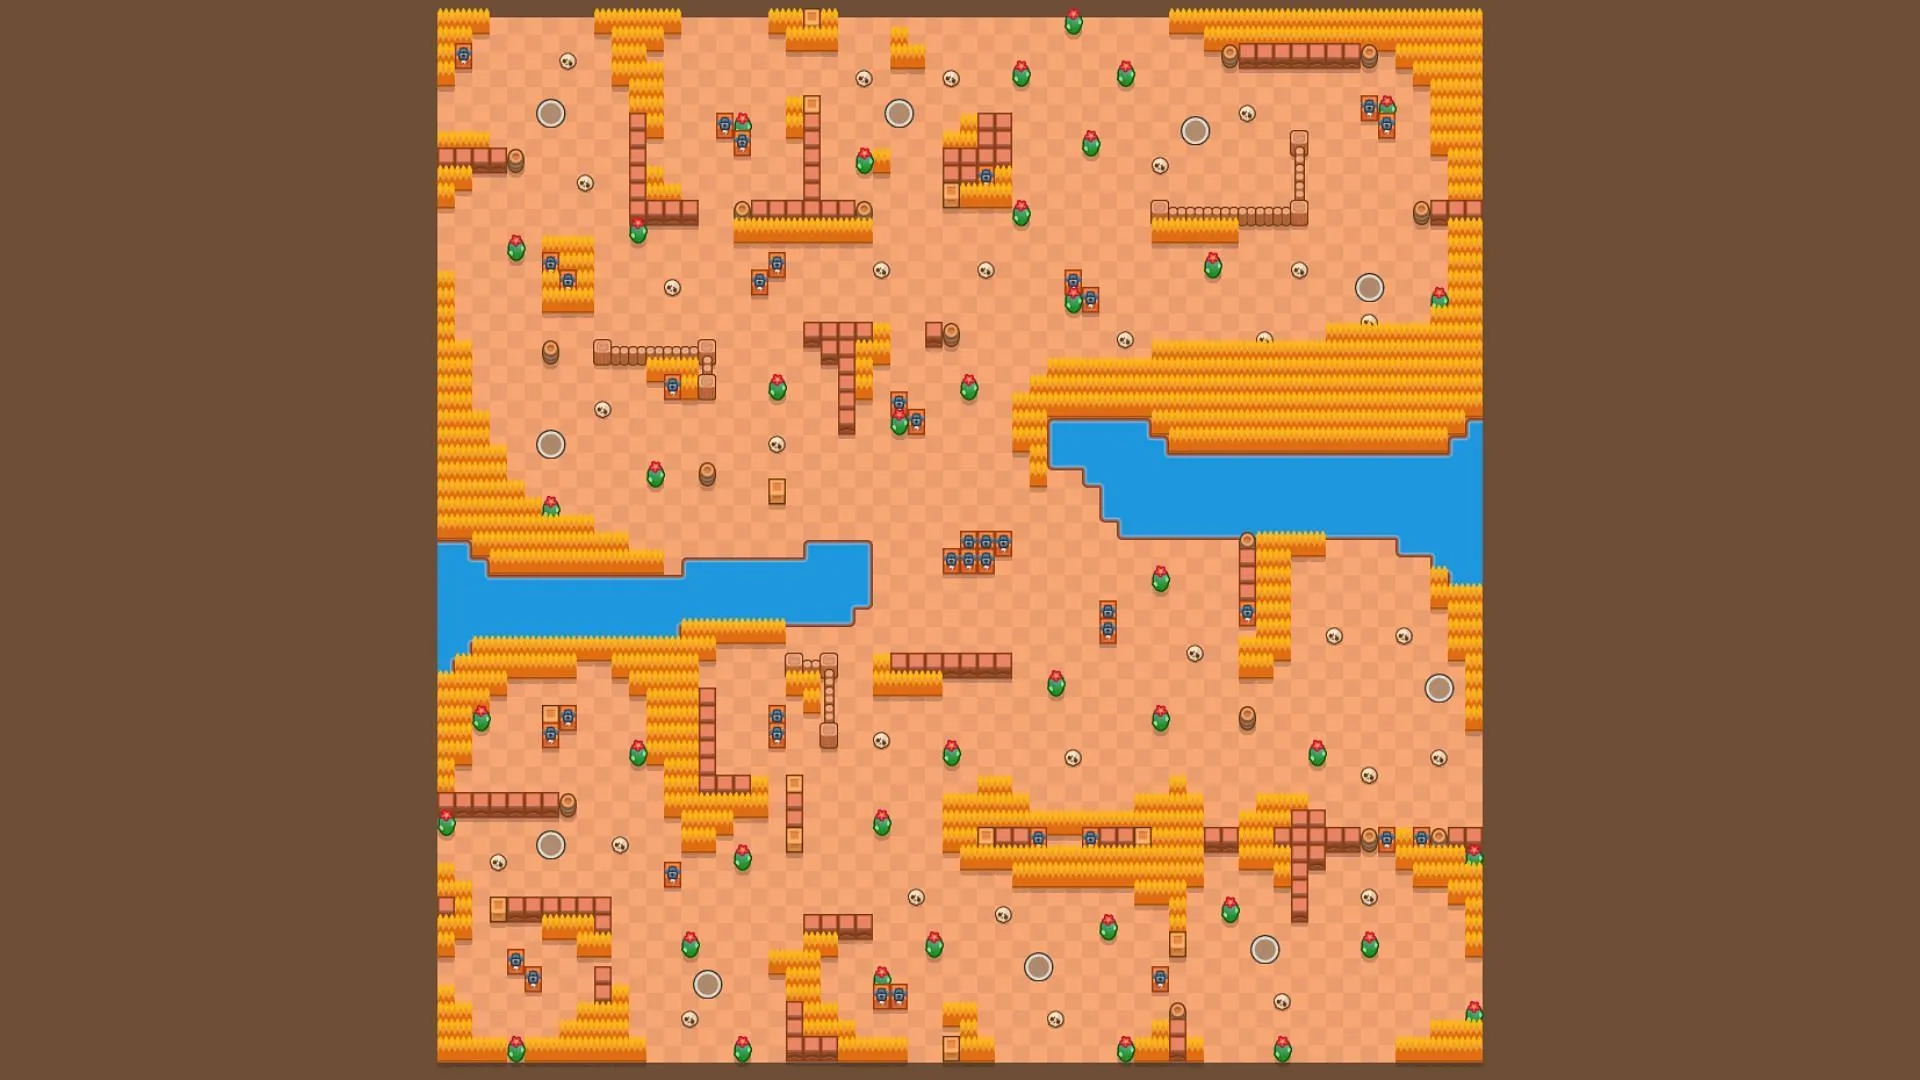
Dark Passage offers an engaging layout, featuring a lake that separates the map horizontally, connected by a middle lane.
Long-range Brawlers like Piper and Angelo thrive here, along with combinations like:
- Colt + Piper
- Moe + Piper
- Angelo + Piper
- Mortis + Piper
- Byron + Piper
8) Flying Fantasies
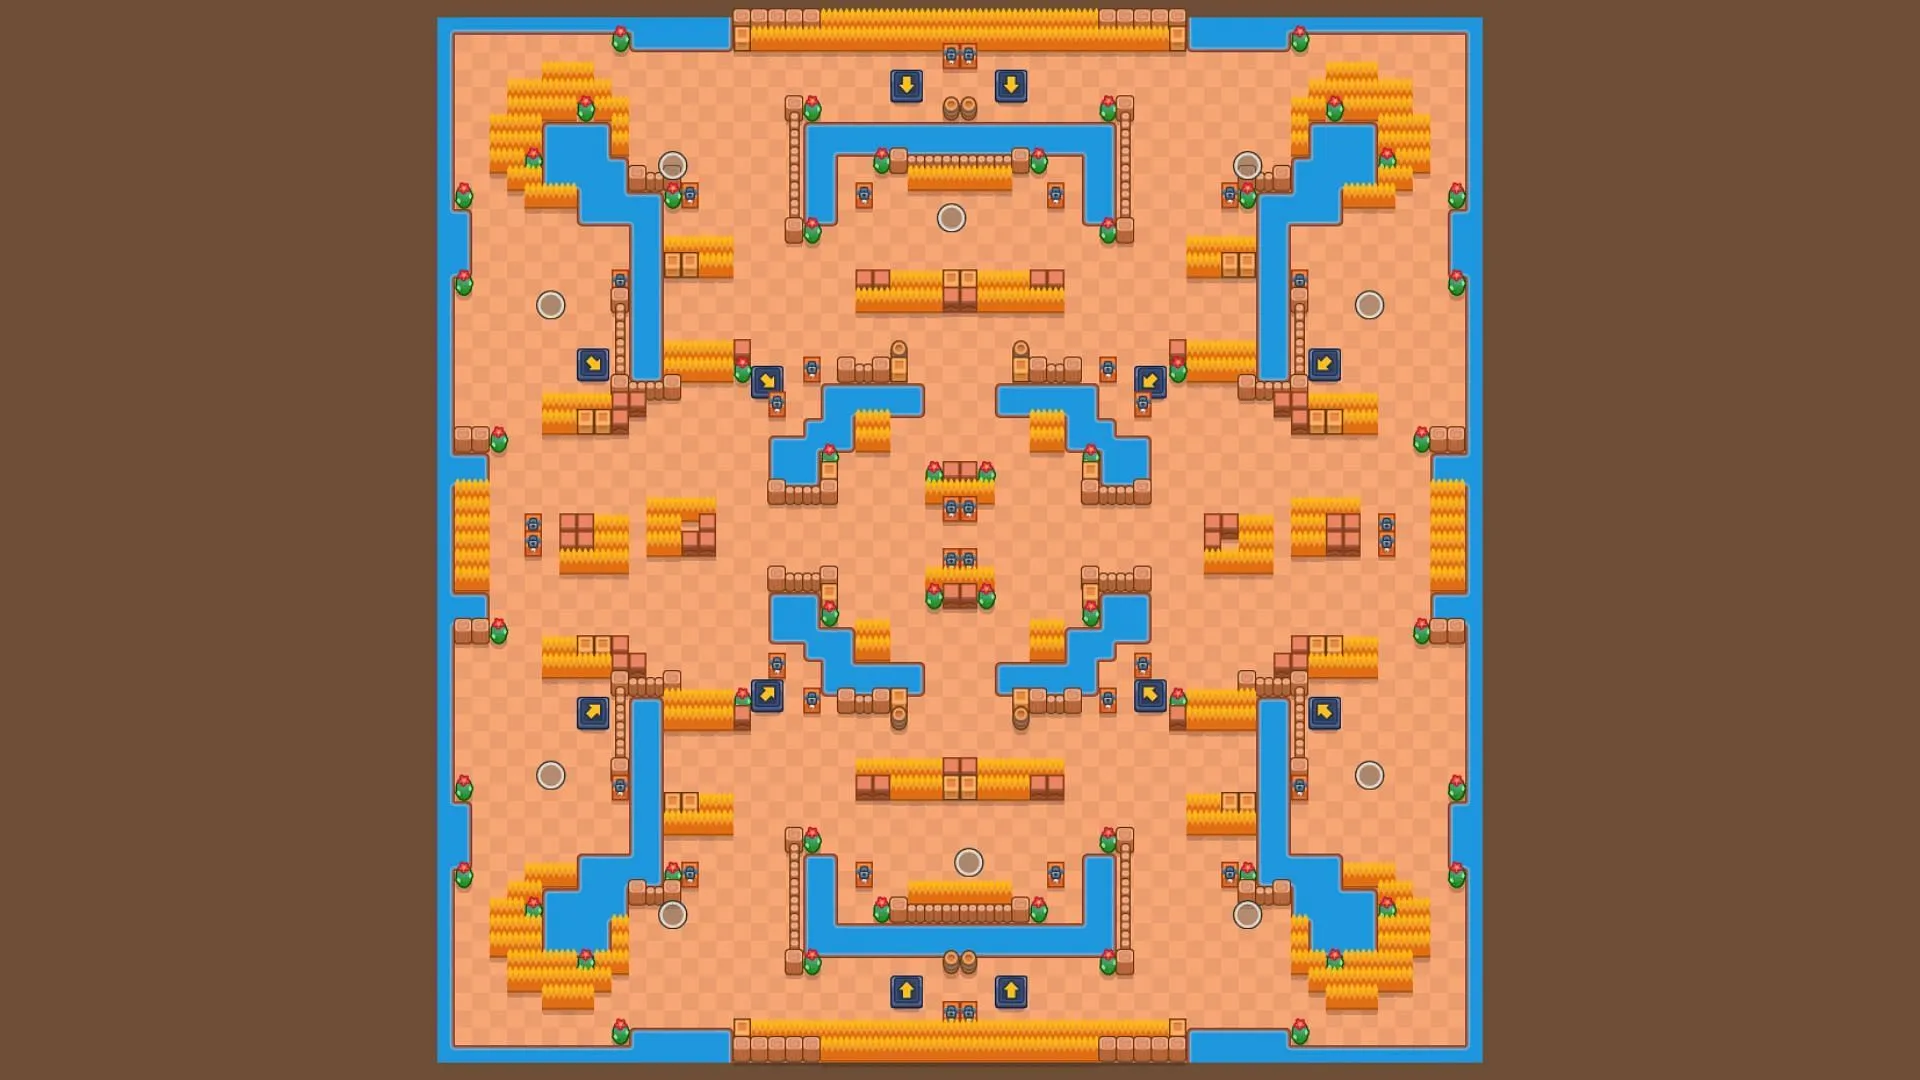
For players who enjoy jumping across the battlefield, Flying Fantasies features numerous lakes and jump pads, perfect for long-range Brawlers.
Recommended team compositions include:
- Clancy + Moe
- Colt + Piper
- Berry + Moe
- Moe + Piper
- Angelo + Moe
9) Safety Center
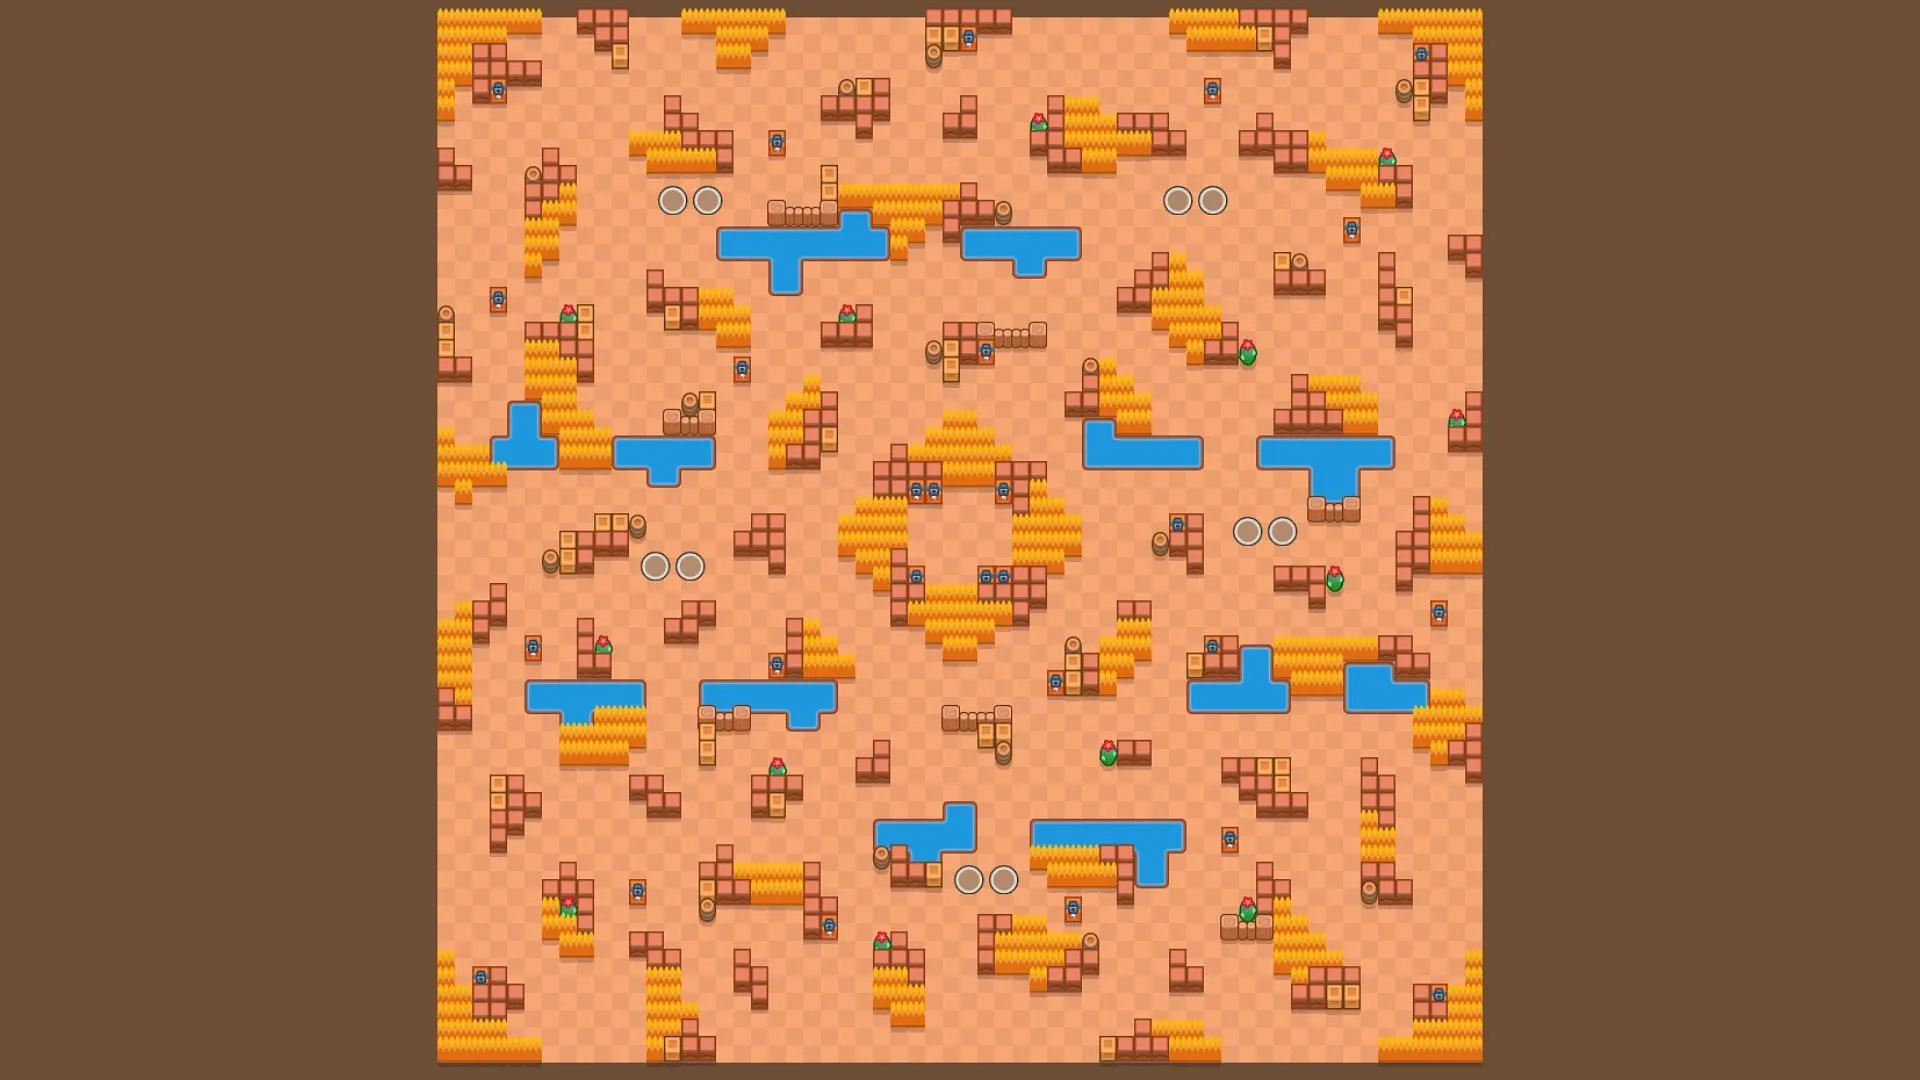
The Safety Center map features four walls encapsulating a bush-covered center, accompanied by six outer walls in a hexagonal formation.
Moe is highly favored on this map, and it’s one of the few maps where Draco can be effectively utilized. Other viable choices include:
- Moe + Clancy
- Moe + Berry
- Tired + Kit
- Moe + Lily
- Moe + Draco
10) FiftyFive
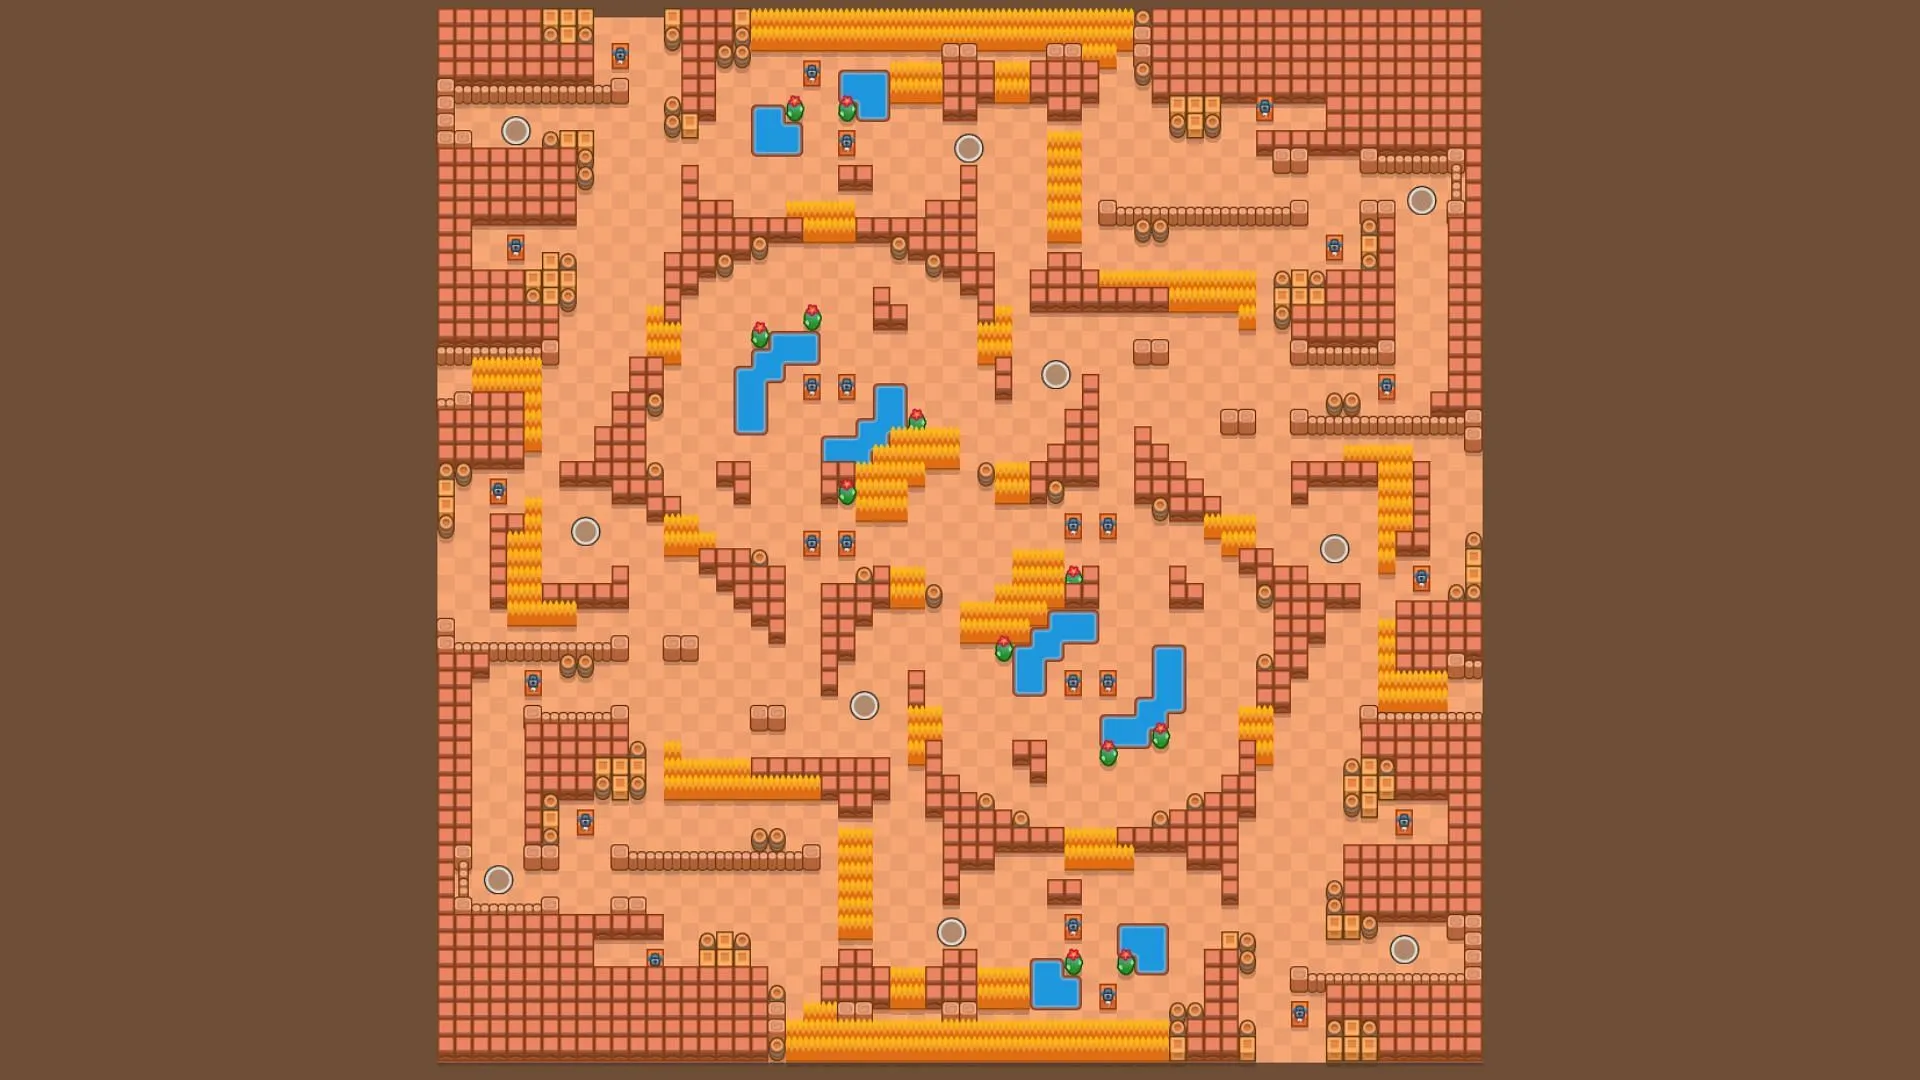
Similar to earlier maps, FiftyFive features a symmetrical design with walls surrounding open spaces and bushes at the center.
Dynamike shines brightly on this map, paired with team compositions such as:
- Dynamics + Kit
- Colt + Kit
- Dynamike + Mortis
- Dynamike + Edgar
- Dynamics + Colt
11) Final Four
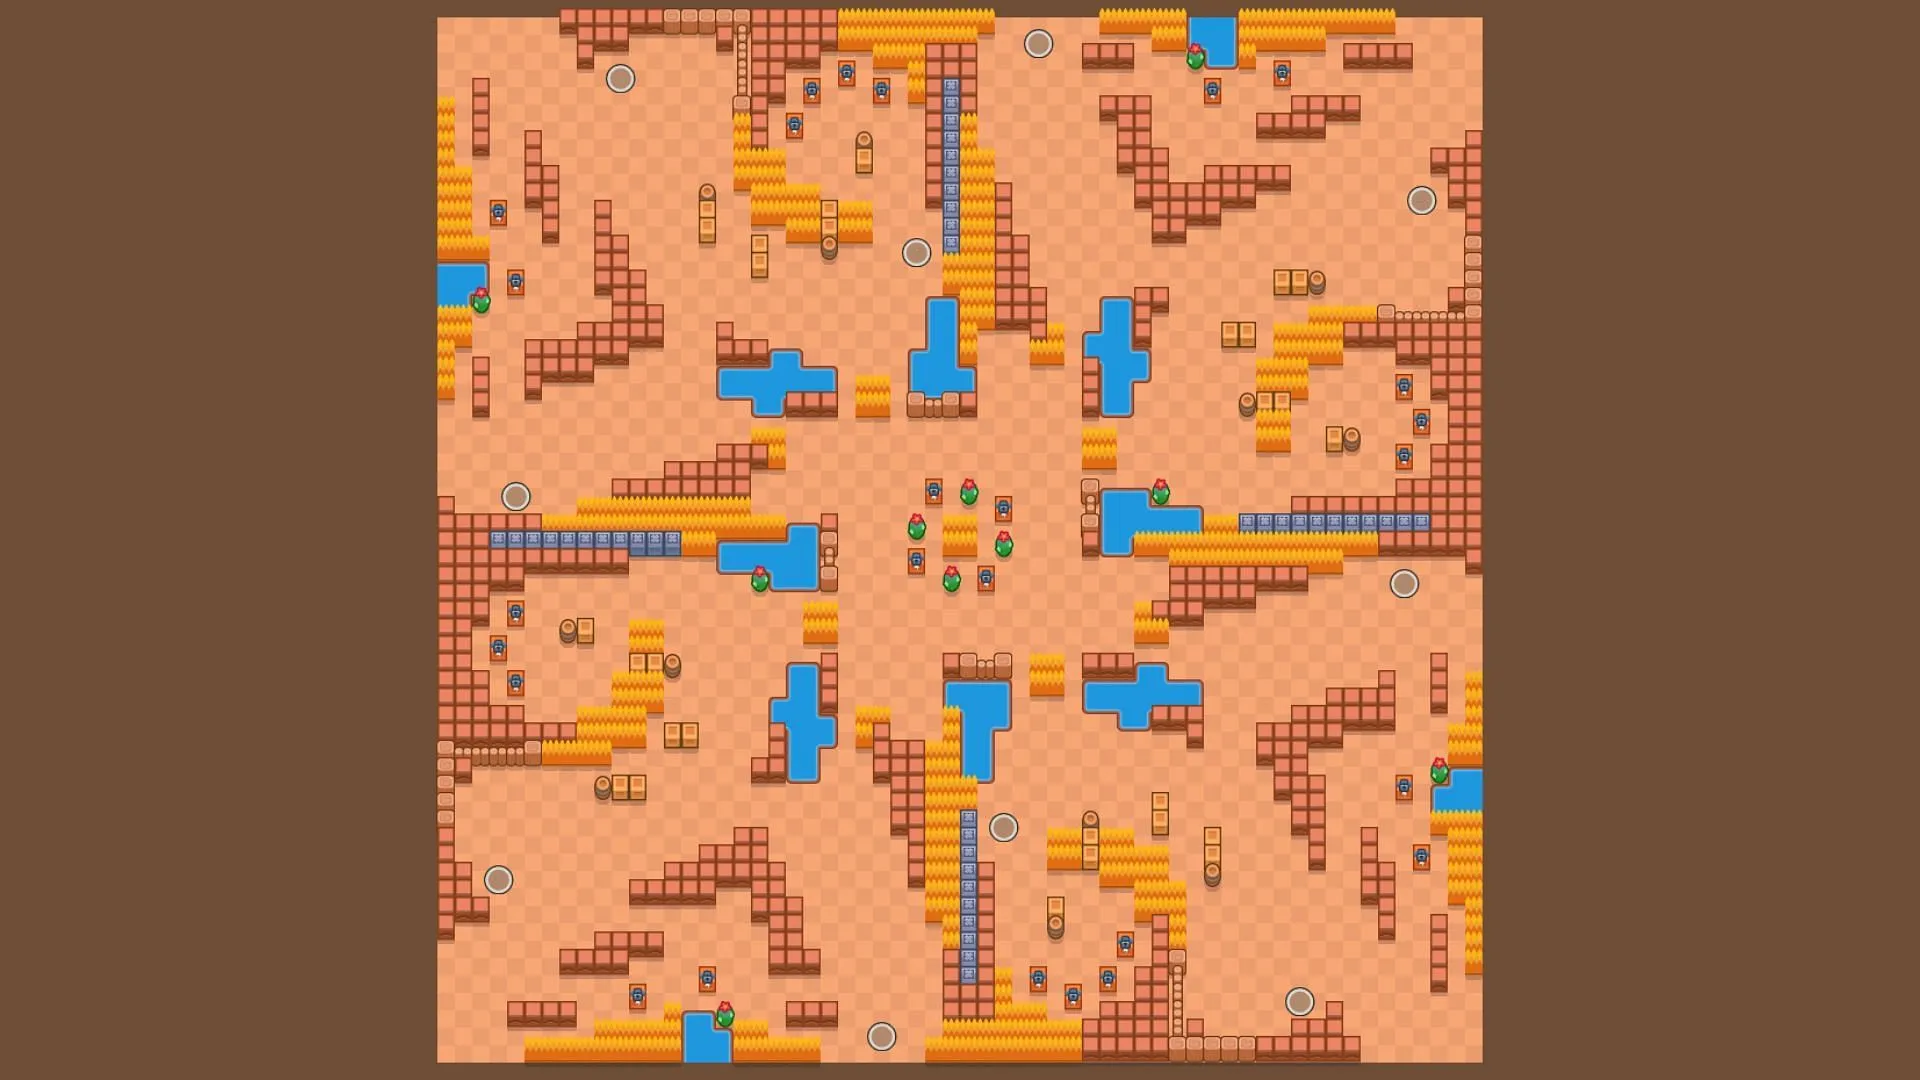
Final Four shares a symmetrical design similar to FiftyFive, featuring narrow walls along the sides and open areas in the center.
Moe thrives on this map due to his ability to hit multiple targets with projectiles. Recommended team setups include:
- Moe + Clancy
- Moe + Berry
- Tired + Kit
- Moe + Lily
- Moe + Colt
12) Sunset Vista
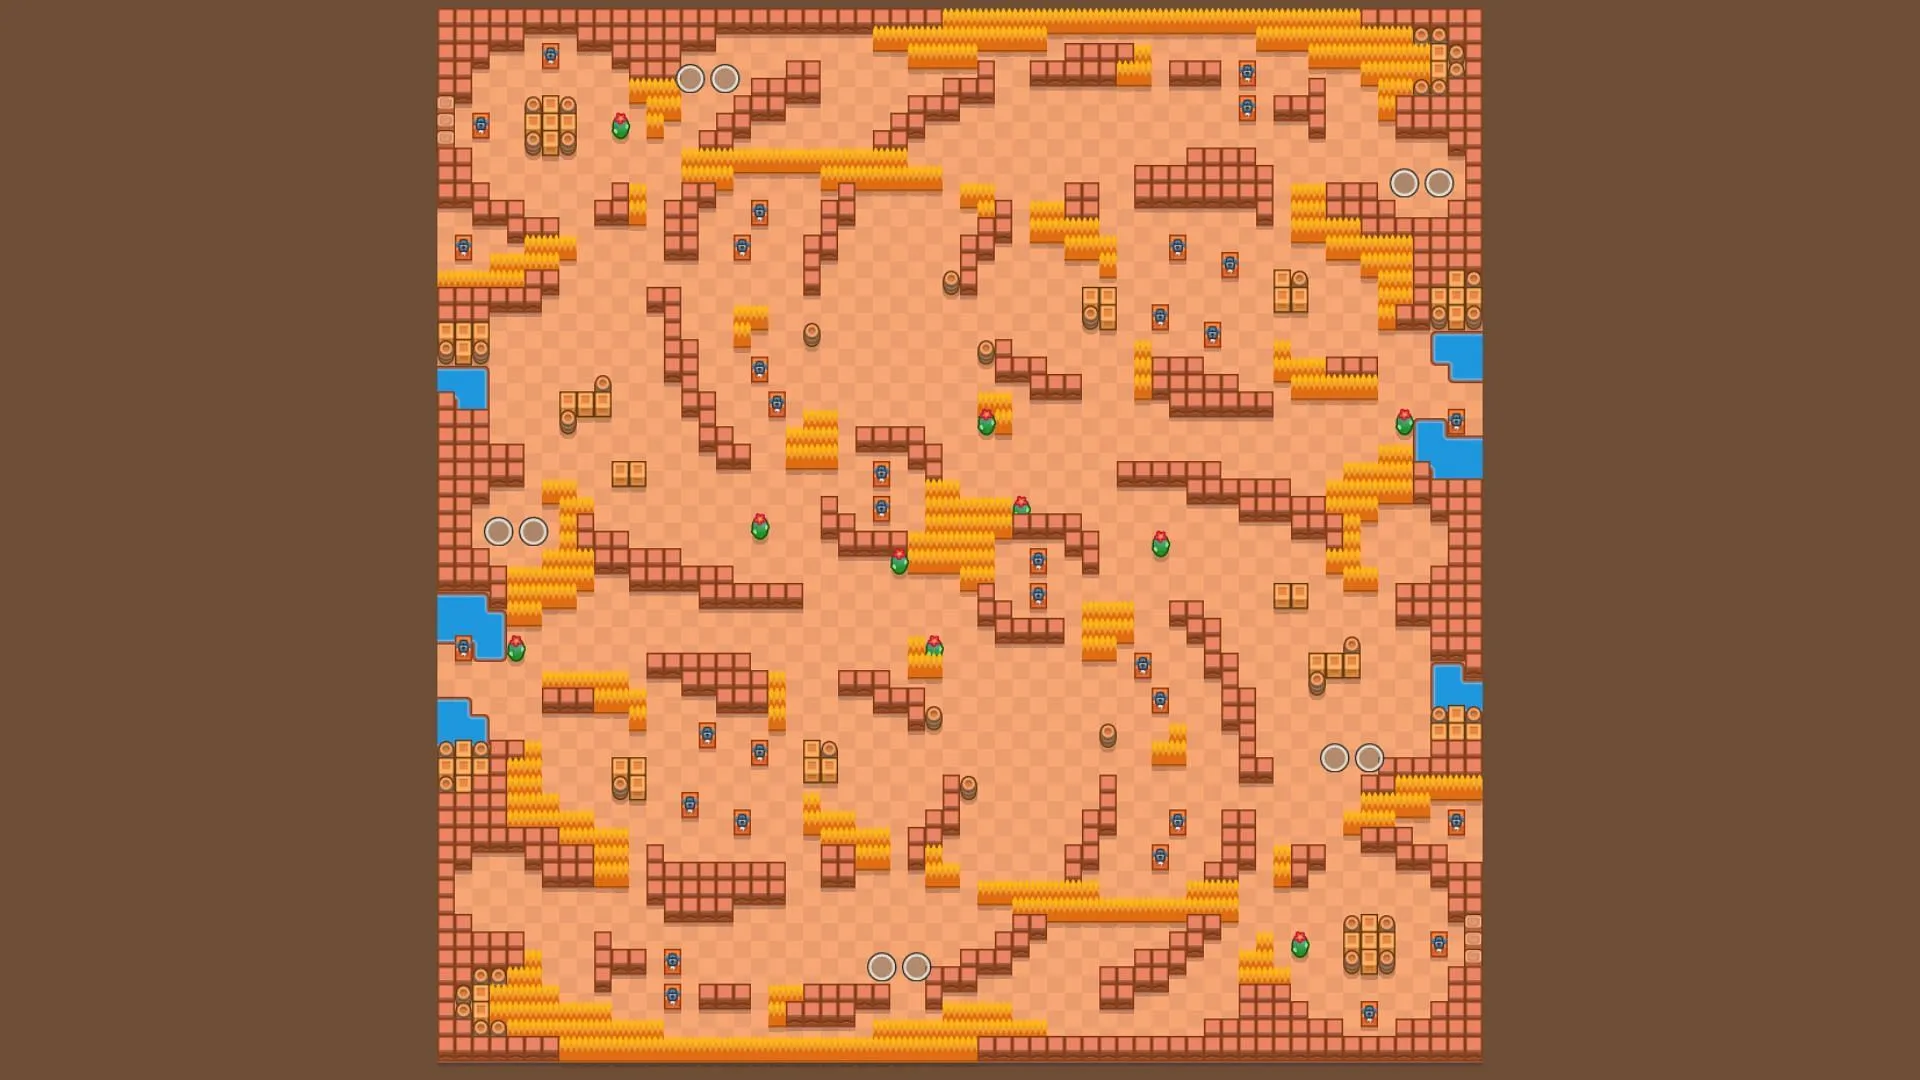
Among community-designed Duo Showdown maps, Sunset Vista stands out. It features a spiral pattern of walls, with water bodies flanking each side.
Effective team configurations for this map include:
- Pam + Gene
- Max + Surge
- Spike + Tara
- Brock + Colt
- Bea + Nita
That concludes the overview of all Duo Showdown maps in Brawl Stars along with the best Brawlers to dominate your opponents and ensure your team is the last one standing.


Leave a Reply