Marvel Rivals has made a significant impact in the gaming community, drawing comparisons to Overwatch while introducing its own unique fun mechanics. However, despite its technical achievements, players have reported a number of issues, particularly when it comes to launching the game. For those experiencing difficulties getting started, this guide will provide a comprehensive overview of troubleshooting steps along with helpful tips to enhance your gaming experience.
Troubleshooting Marvel Rivals Launch Issues
If you’ve encountered problems while trying to play Marvel Rivals, here are several solutions to explore:
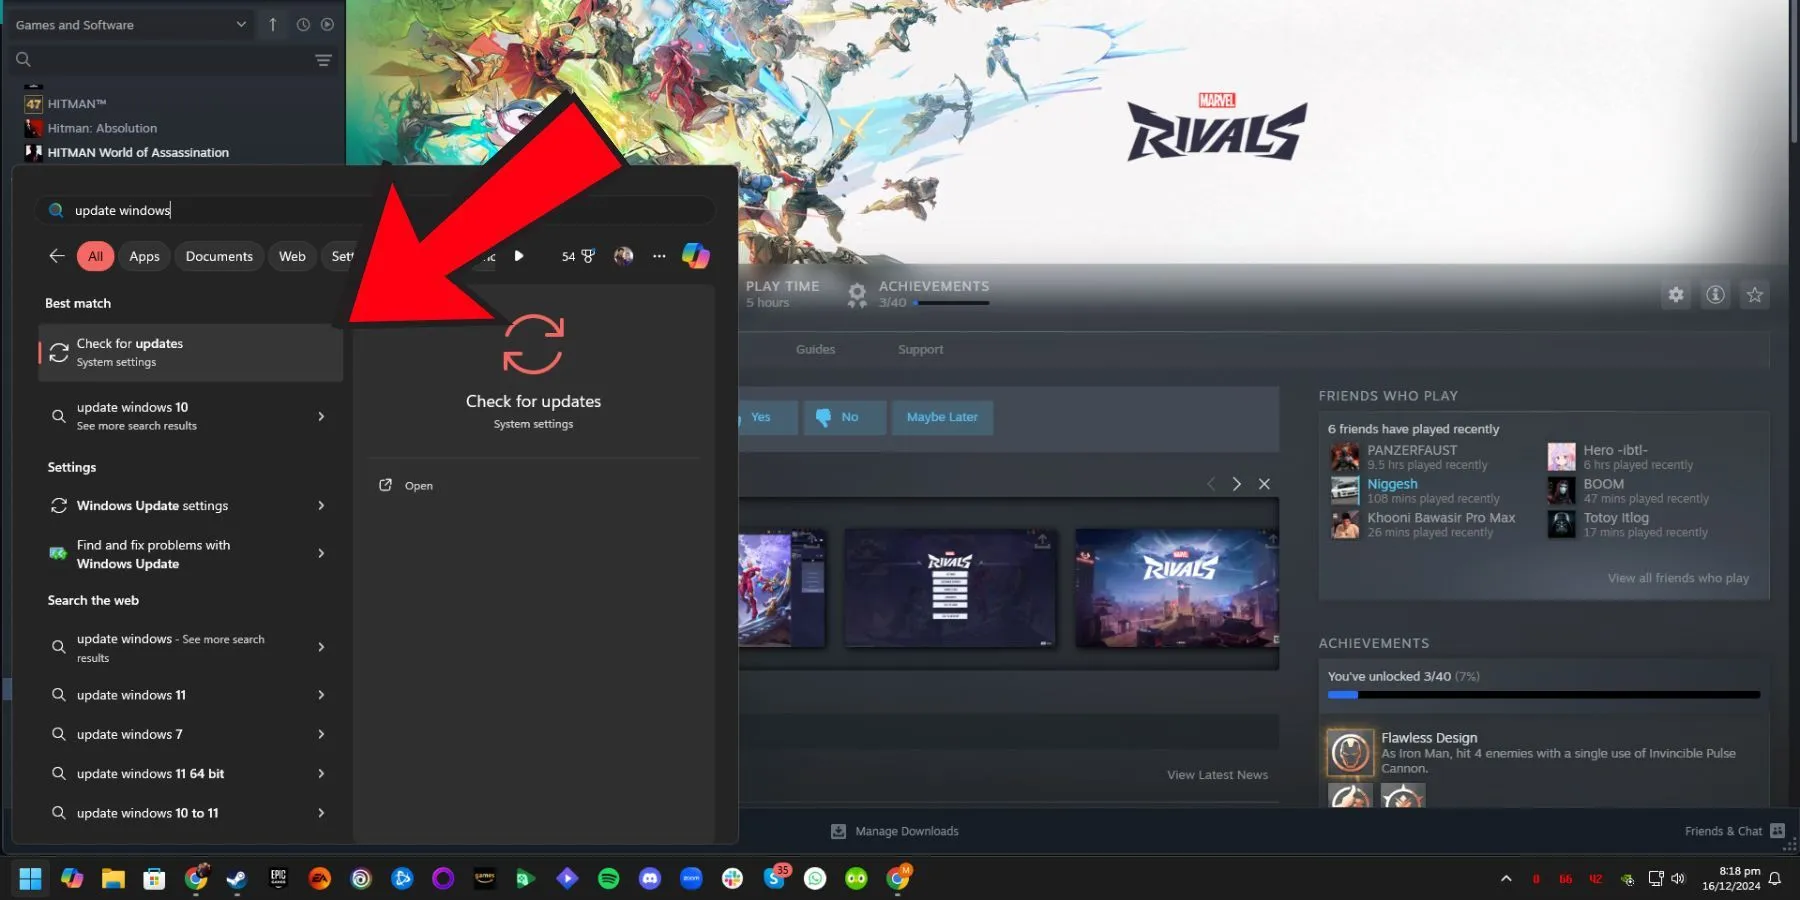
1. Update Your Windows Operating System

Outdated operating systems can lead to compatibility issues. If you haven’t updated Windows in a while, it’s essential to do so. You can check for updates by searching for “Windows Update”in the Start menu and following the prompts to install any available updates.
2. Update Your GPU Drivers
Not having the latest GPU drivers is another common issue. Older drivers may not support the latest features required by Marvel Rivals. To ensure optimal performance, use Nvidia GeForce Experience or AMD Radeon Software to check for and install updates for your graphic card drivers.
3. Install Marvel Rivals on a Solid State Drive (SSD)

Many players mistakenly install Marvel Rivals on a Hard Disk Drive (HDD), which can lead to performance issues and crashes. The game’s developers recommend installing it on an SSD for a smoother experience.
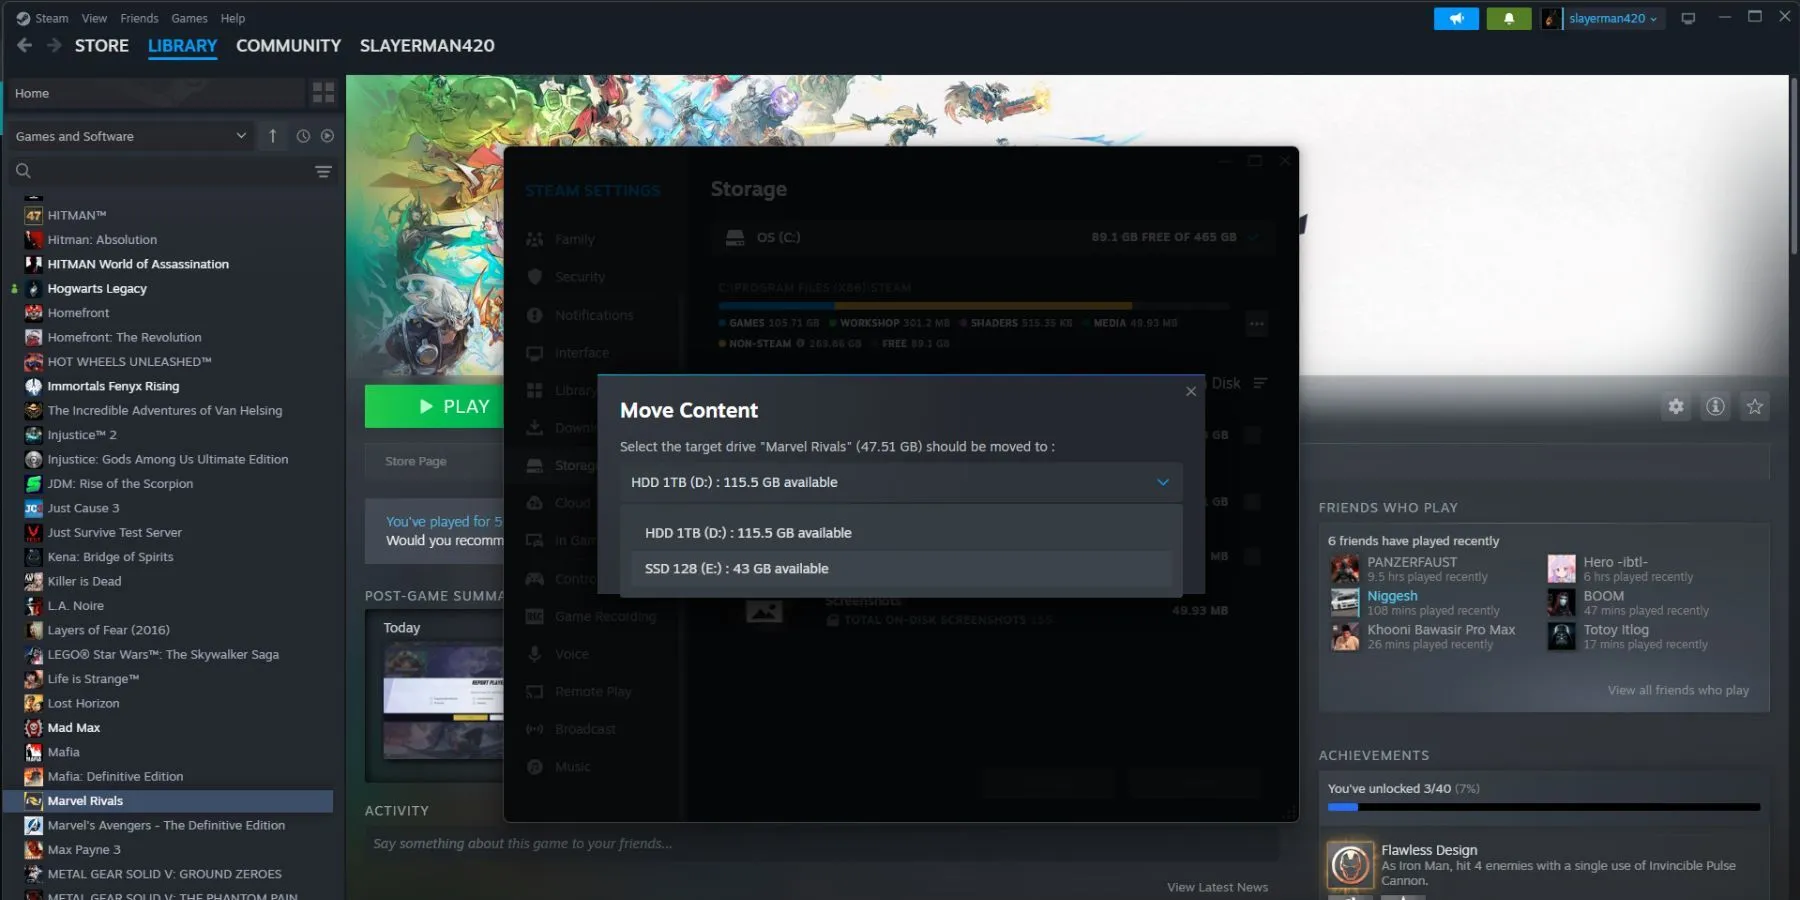
If you’ve already installed it on an HDD, you can avoid a full reinstall. Follow these steps to relocate the game to your SSD:
- Open Steam.
- Select Steam > Settings > Storage.
- Choose the HDD where Marvel Rivals is currently installed.
- Select Marvel Rivals.
- Click Move and select the SSD as the new location.
4. Adjust In-Game Settings
If you continue to experience problems, consider lowering the in-game settings. You can adjust the following options in the Display section of the Settings menu:
- Enable Limit FPS.
- Lower the FPS Cap.
- Set Graphics Quality to Low.
- Adjust Super Resolution Mode to Balanced.
5. Verify Game Files

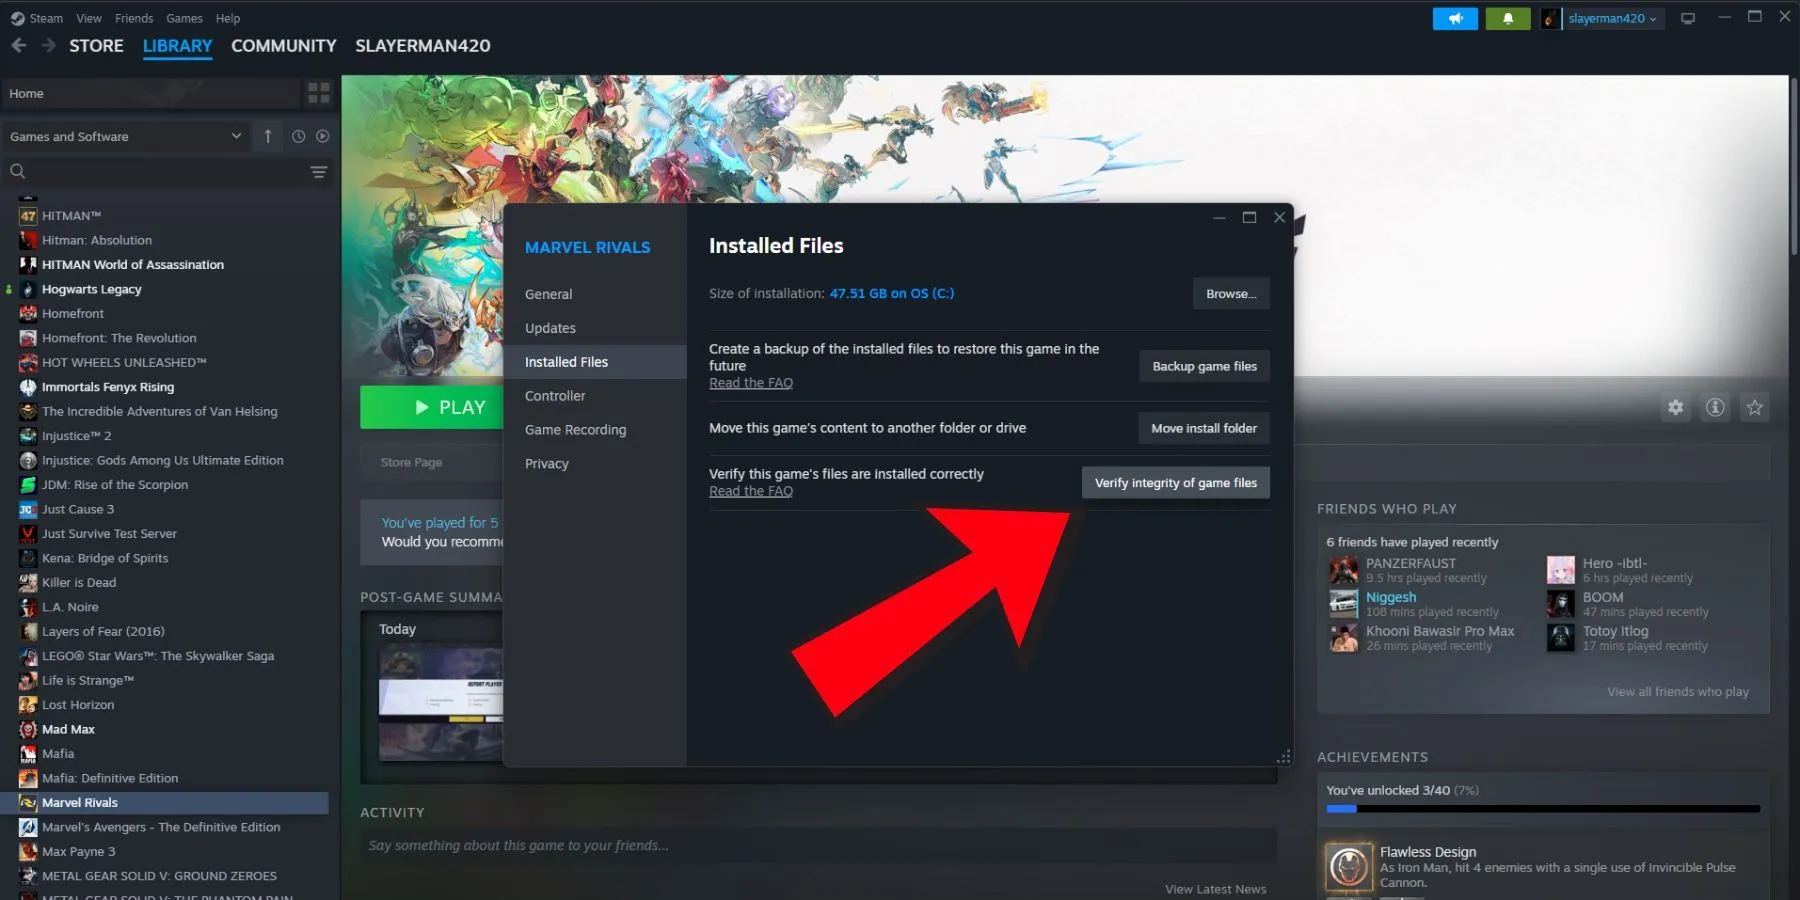
Corrupted files can hinder game performance. To verify game files, follow these steps:
- Go to your Library on Steam.
- Right-click on Marvel Rivals.
- Select Properties > Manage Files.
- Click on Verify Integrity of Game Files.
6. Restart Marvel Rivals
Sometimes a simple restart can resolve technical glitches. As cliché as it sounds, try turning the game off and on again.
7. Check Server Status
Given that Marvel Rivals is relatively new, server issues are not uncommon. Make sure to check the game’s server status by visiting the official Marvel Rivals Discord channel to see if the servers are online.
These troubleshooting steps should help you overcome launch issues with Marvel Rivals. By keeping your system updated and optimizing your settings, you can enjoy a seamless gaming experience.


Leave a Reply