Your Hideout in Path of Exile 2 serves as a personal refuge, crucial for your journey through the game’s endgame content. This customizable space acts like a permanent, fully-accessible town, housing all crafting stations, merchants, and any decor you choose. Beyond aesthetics, your Hideout plays a pivotal role in essential endgame functions, such as navigating the Atlas of Worlds mapping system, which is integral to your progression.
Before you can enjoy these benefits, however, unlocking your Hideout is the first step. Fortunately, this is a straightforward process, and you’re unlikely to overlook it by the time you reach the endgame of PoE 2.
Unlocking Your Hideout
Step 1: Complete the Main Quest


Upon finishing the main questline of Path of Exile 2, culminating in “Legacy of the Vaal,” your next task is to return to the Vaal Ziggurat and converse with Doryani. He will introduce you to the Atlas of Worlds, the game’s endgame mapping system. Your primary objective will be to eliminate enemies across the map, gradually purging corruption and ultimately saving the world. A home base will be crucial for your endeavors.
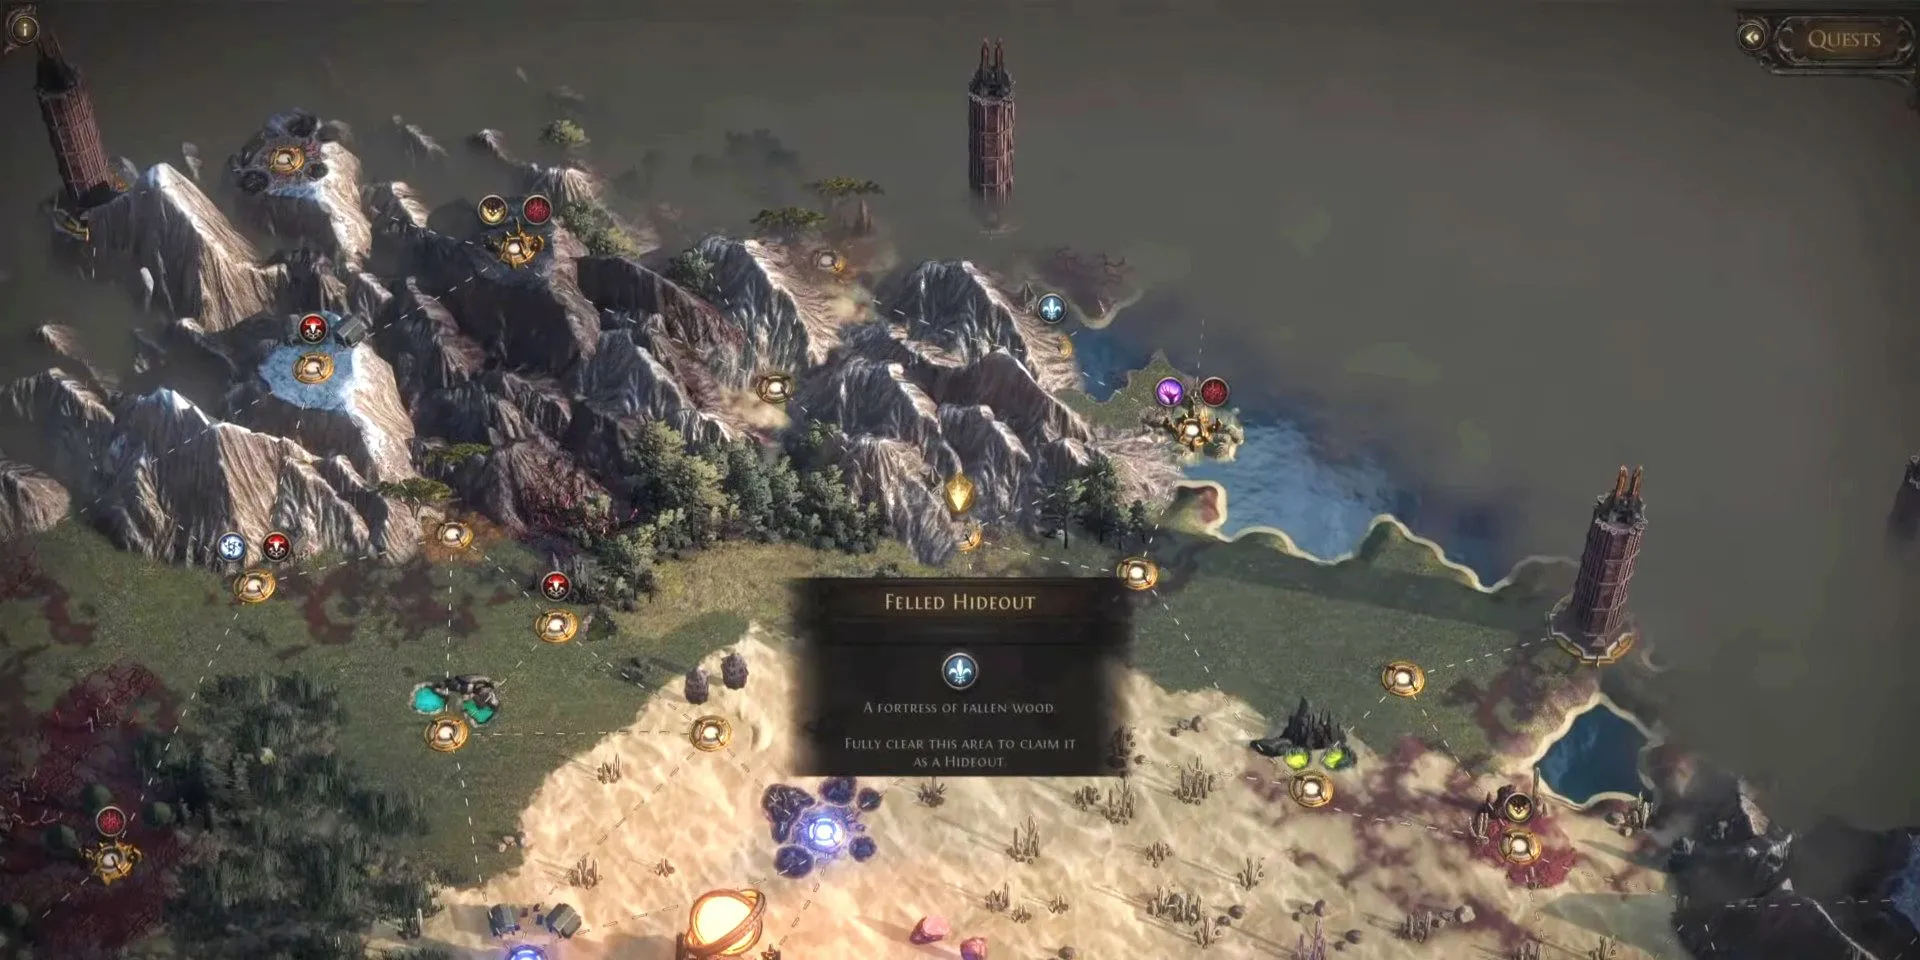
Following a brief tutorial on the Atlas, you will select a starting node to explore. Seek out nodes marked with blue fleur-de-lis icons, which indicate potential Hideouts. Choose one; don’t stress too much about the location as you can unlock additional Hideouts in the future. You’ll then be transported to your selected node to clear away the enemies before claiming it as your own.
And just like that, the Hideout is yours! You are now free to navigate through the Atlas, clearing nodes and progressing through the game. You will make periodic returns to your Hideout to offload loot and enhance your equipment, customizing your personal space as you see fit.
Modifying Your Hideout
Relocating Your Hideout

Shifting your Hideout’s location is a breeze. Simply utilize a Waystone to unlock a new Hideout node on the map, and vanquish the foes populating it. Your Hideout is effectively mobile and can appear at any conquered node.
Altering Your Hideout’s Map & Tileset
If you’re looking to refresh the aesthetic of your Hideout, you’ll need to unlock different Hideout types by exploring the Atlas. There are currently four unique Hideout types: the Canal Hideout, the Felled Hideout, the Limestone Hideout, and the Shrine Hideout. After accessing a different type’s node, simply speak to Alva within your Hideout and select the “Select Hideout” option to change its appearance. You can even customize each of the Hideout maps individually, allowing for quick transitions between them.
Personalizing Your Hideout
Incorporating Crafting Stations, Decor, & NPCs


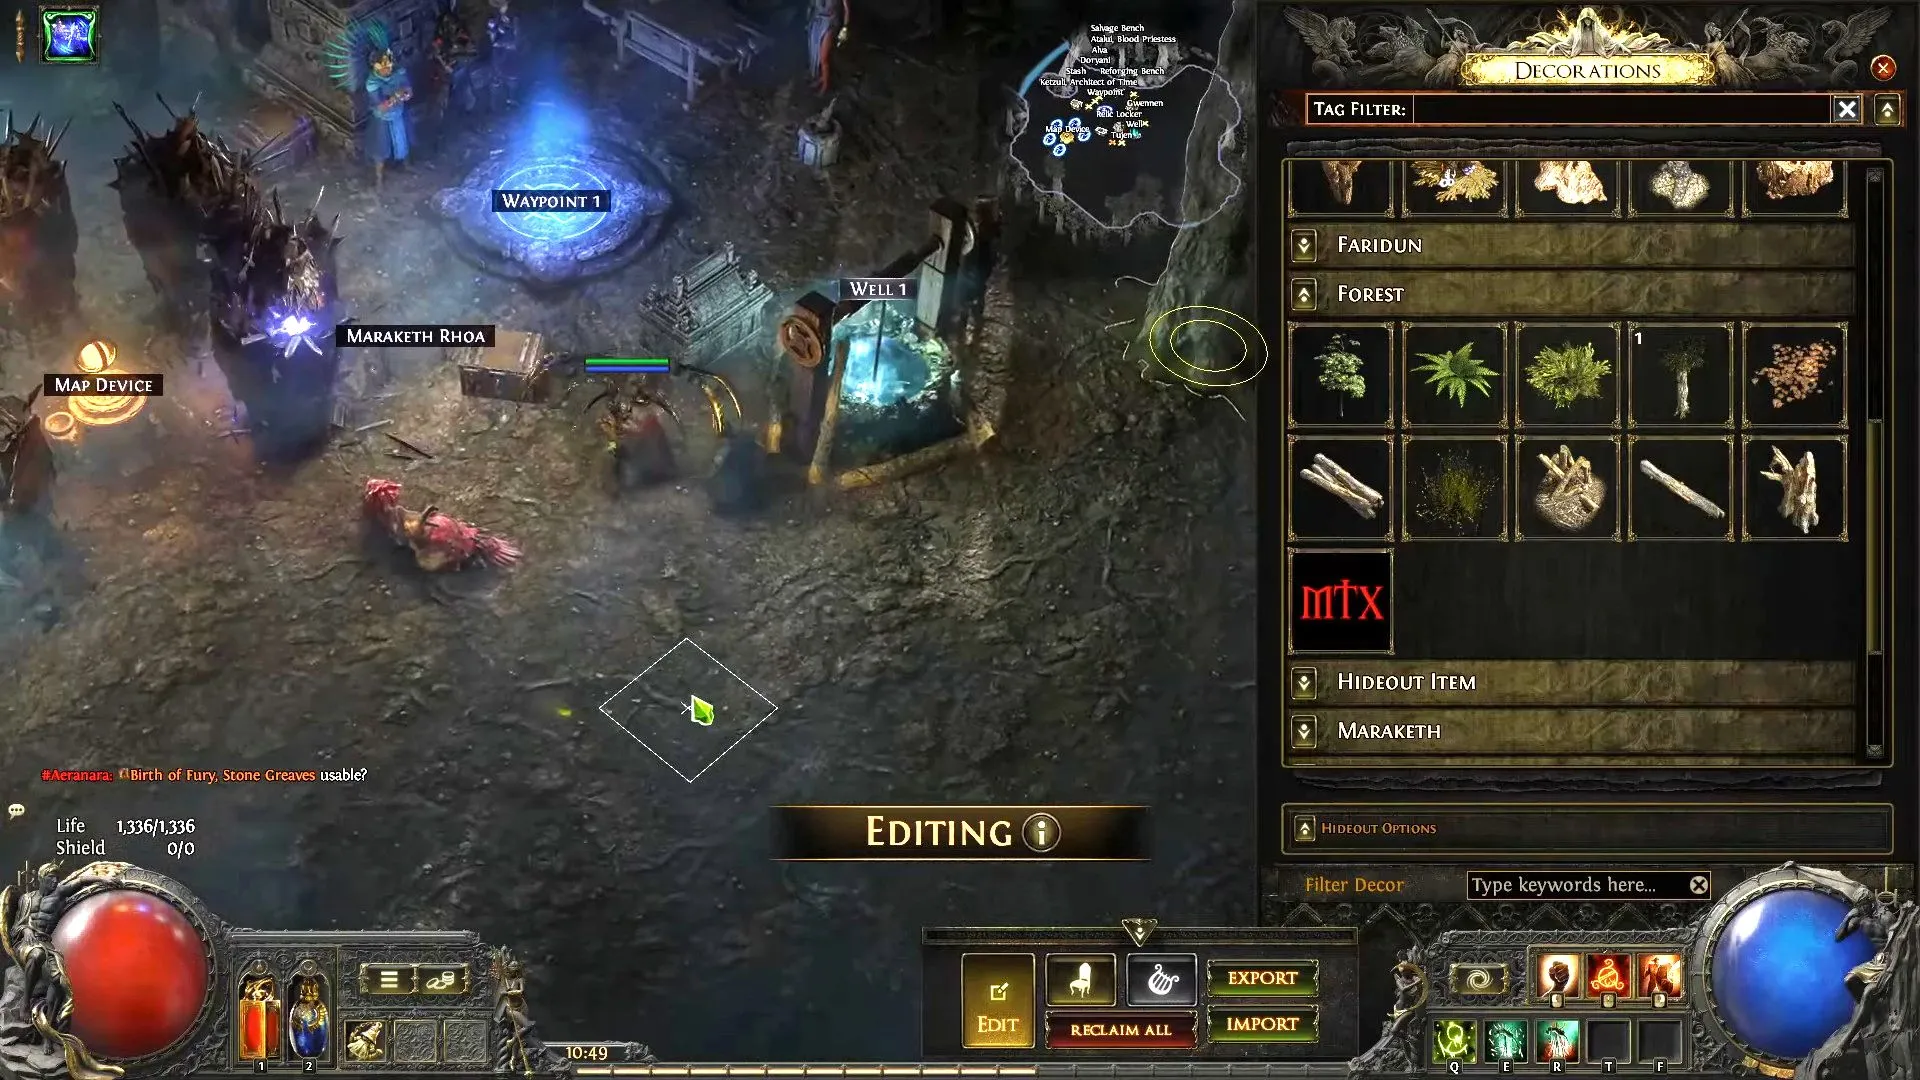
Here comes the enjoyable part: customizing your Hideout. Whenever you’re in your Hideout, simply click on the arrow at the bottom of the screen to open the editing menu. This feature allows you to drag, drop, and rotate NPCs, crafting stations, and decor—a bit like playing a game of The Sims. As you progress, you may unlock additional NPCs and items to enrich your Hideout.
Once set up, you can quickly access your Hideout via the map or by entering /hideout in the chat. Feel free to decorate freely, but ensure that essential resources are easily accessible. Also, you can save your layouts and import them into future Hideouts to speed up the customization process. Many players tend to create multiple layouts and switch them based on their needs or newly acquired Hideouts.
Now you have a comprehensive understanding of how to unlock and customize your Hideout! While the current design options may feel limited, be on the lookout for updates during the early access phase of Path of Exile 2, which are expected to introduce new features.


Leave a Reply